With Adobe’s fairly new pricing regime, Photoshop CC is now within the reach of many enthusiast photographers who might have balked at the idea of weighing out several hundred dollars for an image editing program before. Today, we are going to take a look at a couple of great ways to make your colors punch out in this amazing program.
The Quick and Simple Way
The quickest and easiest way to add some punch to you colors is to use the Vibrance tool. Rather than use the tool directly from the Image – Adjustment – Vibrance menu, it is better to create a new adjustment layer. To do this from the menu, go to Layers – New Adjustment Layer – Vibrance. This is a simple slider tool with two options. Initially move the Vibrance slider to the right. This will add punch into colors that are not overly saturated already and is less of a sledgehammer than the saturation tool. Typically, it adds more saturation to greens and blues leaving the reds and yellows alone. Its an excellent tool for adding some saturation to weak looking blue skies.
If you feel that the image is still lacking, you can then use the saturation slider below. This one is a bit of a sledgehammer, so use it carefully as it will effect all colours in your image.
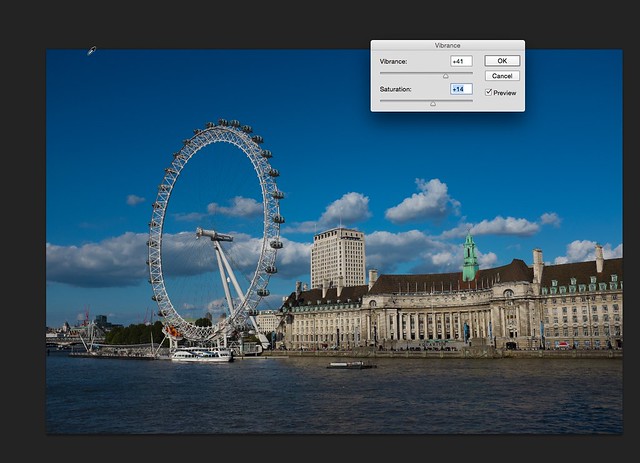
Use Vibrance before saturation to give your colors a kick
The Lab Color Way
This technique is a little more convoluted but much more powerful. It combines a Photoshop color space called Lab Color with the use of curves to control which colors we wish to boost.
First we need to switch our image to Lab Color. This is done from the menu, Image – Mode – Lab Color. Nothing visual will happen to your image, but we are now ready to work on it.
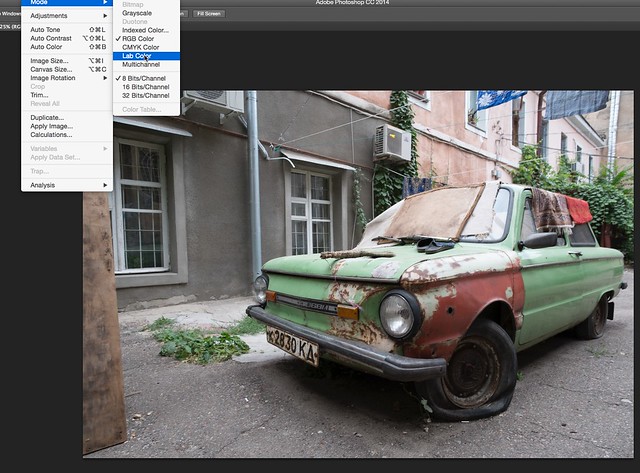
Convert to Lab Color
The first stage is to duplicate the image. From the menu select Layer – Duplicate Layer and give it a suitable name.
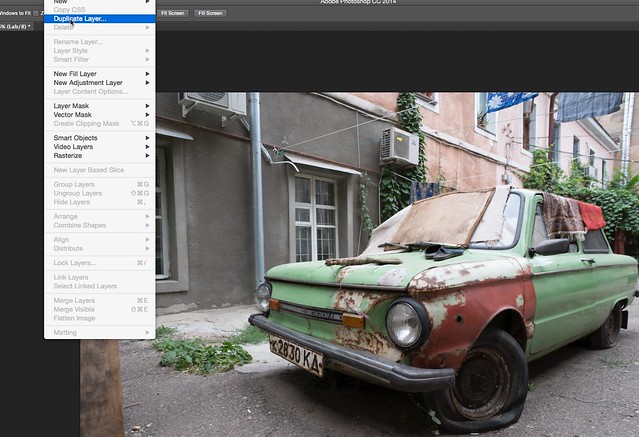
Duplicate the layer
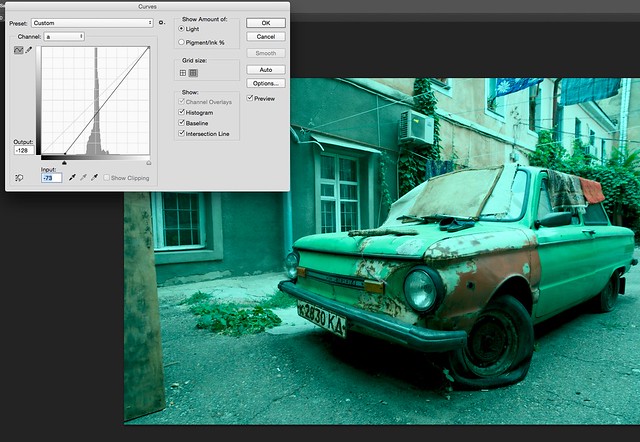
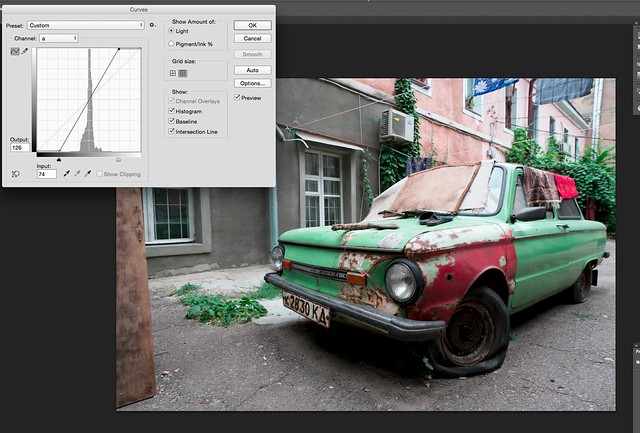
Next we are going to use the curves to adjust the look of our image. Select Image – Adjustment – Curves. The Curves window will open, with its familiar line and histogram. One noticeable difference is at the top. Rather than having RGB and individual red, green and blue channels, the drop down box gives us Lightness, a and b.
Creating a curve on the lightness channel is useful for giving the image an overall contrast boost but keeps the colors the same but the interesting part comes when using the a and b channels. The a channel will change the magenta and green contrast of the image. The b channel changes the yellow blue colors. The histogram represents the exposure in the relevant color channels for that image.
With the a channel selected, drag the lower left part of the histogram in towards the the right. You will see a massive color swing towards green. Bring the line close to but not on the histogram. Now repeat the process from the top right, moving the slider to the left and towards the right edge of the histogram. You will see that this starts to neutralise the massive green cast but has also boosted the contrast of the greens and magentas in the image.
Moving the left slider to the right on the a Channel
Neutralising the color with the upper right slider
Now we are going to repeat the process using the b channel. Moving the lower left point in to the right will introduce a massive blue cast, countered by moving the upper right slider into the left.
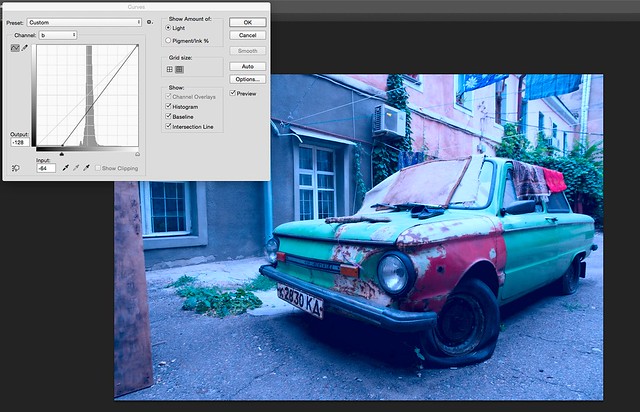
Repeat using the b Channel
Carefully adjust the sliders to return the image to a neutral but much more saturated looking colors.
The end result is probably an image that looks over saturated but the real control comes from the fact that you duplicated the layer at the beginning. Reduce the opacity slider to 0 on the Layers palette to the right of the screen and you will see the original image. Now slowly slide the opacity back to the right and you will re-introduce the saturation that we did using the curves. Move the opacity slider until you get the desired look.
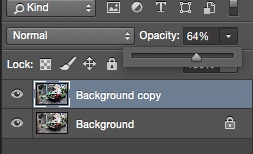
Adjust the opacity
When happy convert the image back to RGB
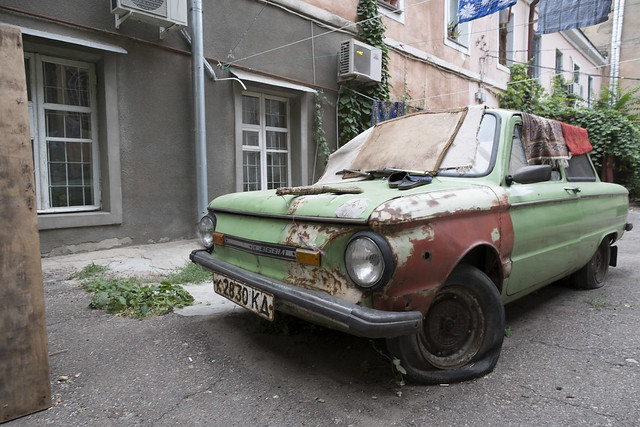
Original Shot
Final result with Lab Color
Boosting colour in Photoshop is a relatively simple and effective process. If you want a quick and simple correction, use the vibrance tool, however if you want a much more controlled and powerful way to make your colour pop, the Lab Color technique is hard to beat.


2 Comments
Is it possible to get a comparison of the two methods outlined above? i.e. the same image that has been processed using the different methods, so we can see the difference in the results? What does the LAB method offer in terms of control that we couldn’t do using the standard Vibrance/Saturation, Hue/Saturation, and color curves tools (especially when these changes are applied to a new layer that will allow the overall effect to be scaled up and down)?
Using vibrance relies on internal PS calculation and algoritms to boost the most “dull” colors and to preserve the “richer” ones. Saturation boosts all of them. LAB method allows you to control separately the channels, to avoid color casts, etc. the bottom line is you’re in control 🙂