tags:
Chamonix, France |
technical snowboarding |team mcnab snowboarding |snowboarding tips |snowboarding steeps |snowboard steeps |neil mcnab |how to turn a snowboard properly |how to snowboard steeps |how to ride steeps |how to ride extreme terrain |chamonix |big mountain snowboarding
Neil McNab knows a thing or two about how to ride steep, technical terrain. The founder of the international backcountry snowboarding and splitboarding guide service, McNab Snowboarding, has spent the past 25 years teaching high-level amateur and pro snowboarders how to take their inbounds riding skills off-piste in Chamonix.
Many consider the Brit to be Europe’s preeminent expert on technical snowboarding. He leads advanced freeride and backcountry snowboarding clinics all over the world. We caught up with Neil during a busy guiding season to ask about which skills you need to have on lock before you start dropping into big terrain.
What are some of the most common riding mistakes you see in clients you take into big, steep terrain?
Freeriding is all about line choice and how you flow with the terrain. You have to work with the terrain, not fight against it. Your choice of line is everything: your speed, your flow, your inspiration all comes from how you look at and use the terrain in front of you.
On groomed trails, you can rotate and slide your board to control your speed as the surface is flat, consistent ,and forgiving. Away from the groomed trail, the snow and the shape of the terrain is constantly changing. It's more difficult to control speed by rotation and skidding. You have to work with the terrain and control your speed by the line you take.
How much you turn dictates the speed that you'll come out of the turn and the speed that you'll carry into the next one. Once you start to ride too fast for the terrain and/or your ability, you'll quickly learn that speed is far harder to lose than it is to gain in tricky or steep terrain. If you get it right, you'll be able to ride a fast, fluid line that works with the terrain and allows you to get creative with the natural features of the mountain.
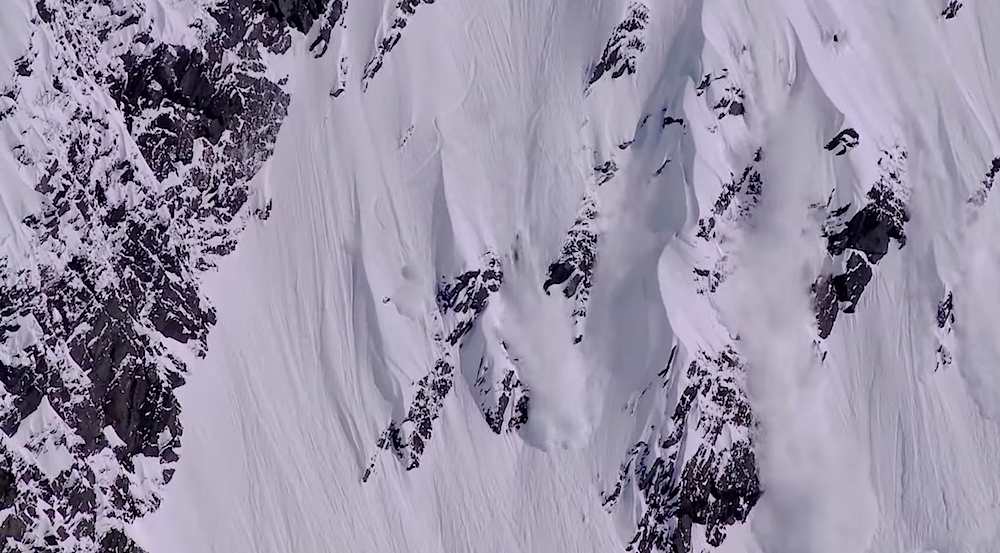
 Find the terrain that works with you instead of terrain you have to fight. And look where you're riding, not down the fall line. Neil McNab photo.
One of the most common mistakes riders make when starting out in the backcountry or on steep terrain is to look too far down the slope. Most of the time we don't actually ride downhill but around the hill. The amount of time that we actually hold the fall line is a small fraction of the ride. Most of the time we're either turning in or out of the fall line. So, we need to look at where we are actually riding more than we need to look down the slope. Where you look has a great impact on how you ride.
Another big mistake in steep terrain is to try to turn too quickly. A lot of riders try to get from one edge to the other with a quick board rotation. The only way to do this effectively is to actually jump the board around and land as gently as you can. If you try to drop to the fall line with the intention of rotating your board across the slope without any kind of arc, then you'll overload the end of your turn and skid. In effect, you're putting all the speed and pressure control into one direction.
The best way to turn on a steep slope is to make as much of an arc as you can. You need to make the 'J' turn by dropping into the fall line on a flat base and then arcing smoothly across the slope as gently as possible.
Can you talk specifically about the kinds of skills one should have going into extreme terrain?
Before tackling steep or technical backcountry terrain, you should have a good understanding of how a board actually works and understand that we change direction by following an arc or curve. The smoother the arc, the more efficient the direction change.
A lot of riders turn their boards by rotating and skidding them. Only cartoon characters such as Wiley Coyote can change direction at right angles. Unless you are a fictional animated character, then you'll have to obey the laws of physics, follow the curve, and learn to bend and flex your board to turn it by its design rather than by force. A board is designed to be turned by bending it along its edge. The shape of a board, its flex characteristics, and its sidecut dictate how it will turn in an arc along its edge from tip to tail.
There's a pretty simple rule here. The more you edge, the more pressure builds up and the more the board flexes. The more the board flexes, the more the board turns. To make the board turn more you need to increase the amount of edge tilt, which increases the pressure and bends the board. Likewise, less tilt equals less pressure, less flow, and less steering.
How much we bend the board as it runs along on its edge dictates the shape of the turn the board will take. For example, if you run a board along on its edge with all of the edge in contact with the slope, the board's sidecut will cause it to follow an arc.
By applying pressure to different parts of the edge through our feet, we can dictate the shape of arc that we make and control how much we turn. The more you bend the front part of the board, the tighter the start of the turn will be. The more you bend the tail of the board, the tighter the finish of the turn will be.
We never really ride using both feet in the same way. Both feet should work independently of one another. The front foot will work more in the beginning of the turn to create edge tilt, pressure and flex in the front of the board to start the arc. The rear foot will work a lot more in the end of the turn to create edge tilt, pressure and flex to close the end of the turn.
Can you describe how to effectively traverse above exposure?
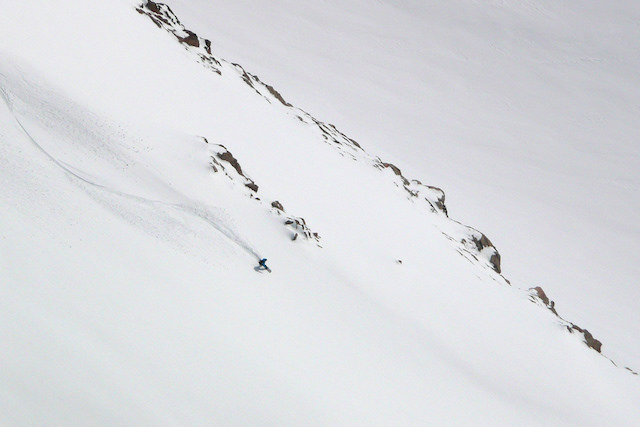
 Xavier veers across the fall line above some heavy exposure in the Alps. TimeLine Missions photo.
A board on its edge will turn as it runs across the slope. When you traverse and edge the board with both feet, it will try to turn up the slope in an arc. It can't actually go up the slope. Instead, it will arc to the point where it can't arc upwards anymore and then slip sideways down the slope.
In order to traverse effectively, you basically have to stop the board from steering up the slope by taking the effect of the side cut out of the edge. This is easily done by using what I call a "negative steer." Edge the board with the rear foot and flex the front of the board down the slope very slightly. If you are on your heels, for example, hold the edge with your rear heel, while pushing very gently down the slope with your front foot towards your toe edge, thus torsionally flexing the board and steering very slightly down and across the slope.
You'll need to make micro-adjustments to hold the line and speed that you need, but this technique means that you'll never have trouble traversing again.
Can you talk about why turn shape is important in steep terrain, and its overall role in speed management?
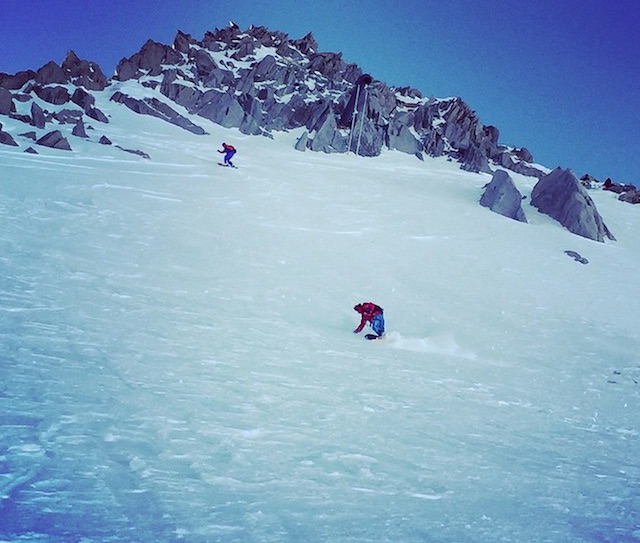
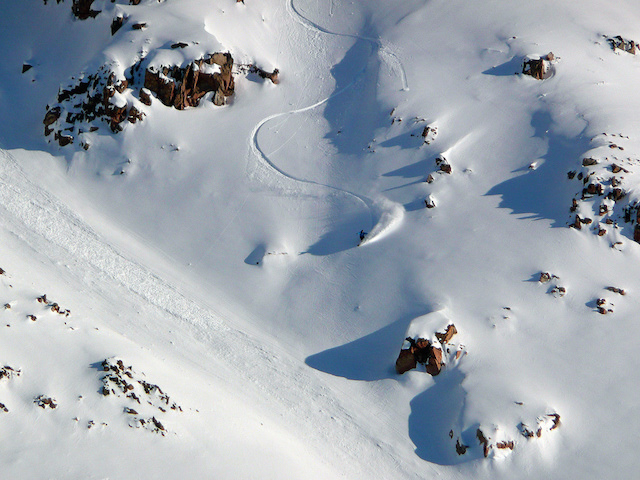 "How much you turn dictates the speed that you'll come out of the turn and the speed that you'll carry into the next one. Once you start to ride too fast for the terrain or your ability, you'll quickly learn that speed is far harder to lose than it is to gain in tricky or steep terrain." Neil McNab photo showing some good client riding in the steeps.
Controlling speed on steep terrain is very important. Once you get going too fast, slowing down is very difficult. Depending on the exposure below, loss of control can have very serious consequences.
When we freeride, we need to bend the board so that it follows the right arc to fit the terrain, our chosen line, and control our speed. Imagine how much you'd need to turn to ride a bike down a wide, mid-gradient slope without using the brakes. To ride with a constant speed and not lose control, you'd finish your turns riding back up the hill.
When we turn on a steep gradient, there is always going to be a certain amount of acceleration as we cross into the fall line. In order to keep this acceleration down to a manageable amount, the arc of the turn can start slightly uphill. If we start the turn going uphill into the arc, by the time we reach the fall line, acceleration is at a minimum. This reduces the amount of edge pressure that we would need to control the end of the turn, and reduces the chance of skidding out.
By contrast, if you start a turn with acceleration, you'll have more pressure to deal with at the close of the turn. You need to use more edge control and drop your lower center of gravity. In good snow, this might not be a problem. In variable or firm conditions, this might cause some problems.
If the snow is good and you're using the whole base of the board, as you do in powder conditions, then you can handle more pressure, carry more speed, open your turns, and follow a steeper line. If the snow is firm or icy, you're riding on the edge of your board. Handling the pressure at the end of the arc becomes more difficult. You'll need to reduce the speed that you carry and close your turns.
Your best scenario on firm, steep terrain is to carry just enough momentum to start each new arc slightly up the hill and therefore reduce your acceleration towards the fall line. If it's very technical and you come to a stop at the end of the turn, your next turn will start straight below you. Then, you'll need to make a 'J' turn because you can only change edges in line with your momentum.
Your best scenario on firm, steep terrain is to carry just enough momentum to start each new arc slightly up the hill and therefore reduce your acceleration towards the fall line. If it's very technical and you come to a stop at the end of the turn, your next turn will start straight below you. Then, you'll need to make a 'J' turn because you can only change edges in line with your momentum.
 Rolling over the top of the tire, feeling the flow. Neil McNab photo.
To understand this, we go back to our bike analogy. Imagine you're riding and turning left on the lefthand side of the tire. The next turn will be on the righthand side of the tire. To get from one turn into the next, you'll have to roll over the top of the tire. You cannot come out of one turn and simply turn the wheel into the next. You have to first follow the end of the arc, straighten the bike out, and then you can turn. If you had no momentum at the end of the turn because you applied brakes, then now you can turn as sharply as you like.
Direction change follows an arc. The less arc, the more focused the direction change, and the more pressure builds up. The more pressure there is, the more likely you are to skid out of the arc and loose control in a fall line skid. Once you hit a fall line skid, you need to control the speed as quickly as you can so as to not overload the following turn and accelerate down the slope sideways.
You've spoken openly about how many snowboarders don't master their toeside turns, and how that negatively impacts their riding. Why are toeside turns commonly left unfinished and what's the result on one's riding?
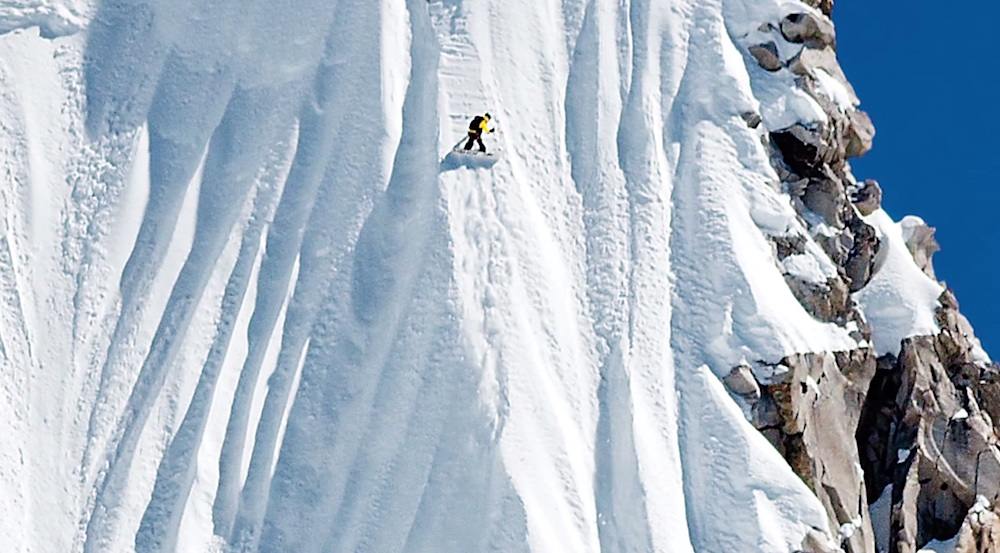 Jeremy Jones executes the toughest toe-to-heel turn in snowboarding history. Photo from Higher.
A lot of snowboarders think that their heel side turn is their weaker turn because it is the one on which they most often skid out. The actual reason for this is because most riders don't actually finish off their toe side turns enough, and therefore accelerate into the heel turn.
We balance and edge more easily on our toeside due to how we flex and bend our ankles. As such, we can handle a lot more edge tilt and pressure on our toe edge than our heel edge. Therefore, if we use the toe side turn effectively and close it more, we can take the excess pressure out of the heel turn. This technique won't overload the end of the heel turn and make the next turn easier to control.
The reason most people don't finish their toe turns is because the look down the slope rather than around the arc to where they'd need to go to control their speed by using a good line. Because of this, they come out of the toe side turn too early. They leave the toeside turn open to the fall line, and then carry too much acceleration into the heel turn, which causes rotation and skidding.
To close off your turns, turn more at the end of the arc. Use the flex in the board's tail by steering your rear foot at the end of the turn. This will help you control your speed better at the end of your turn, and reduce the acceleration into the next one. Once you get dynamic and skilled at this technique, you'll be able to play around with your line and explore different ways of riding the mountain's natural terrain.
How can snowboarders best absorb variable terrain and snow conditions? Can you talk about how we should flex and extend in different types of terrain and during different kinds of turns?
I sometimes hear riders saying that there is no perfect way to ride, that there's no right or wrong technique. While I agree with regards to personal flair and self-expression in riding style, I do disagree with that statement.
We all pretty much bend and flex in the same way. Some of us are taller, shorter, wider, or more flexible. But we all function and move in the same manner. We are all also using very similar equipment that works in the same way. Our center of gravity is pretty much in the same spot over the board. We need to move pressure forwards to start the turn, flex the board on the edge with our front foot while balancing and starting the turn. The pressure then moves back along the turning edge to the rear foot, the edge is tilted towards the back of the board and the board bends and flexes out of the arc. We need to flex and extend to stay in balance.
It's pretty simple really, not rocket science. It’s simple biomechanics combined with an understanding of how the board works and some simple physics of direction.
 Do you understand why you bend into turns and extend out of them? Neil McNab photo.
Another interesting saying I hear, and I often ask my students, is what their understandings of why we bend into the turn and why we extend out of the turn while changing edges. The normal response is that they think they stand up to unweight the board while changing edge. This is a misconception that comes from the early days of skiing when it was the norm to actually extend upwards fast enough to unweight and jump the ski from one turn direction to the other, known as the "short swing."
The sole reason that we need to bend and flex on a board is for effective balance. The more we tilt the board onto the edge in the turn, the more we need to sink and flex to keep our center of gravity over the board. This is also affected by the snow quality and speed. In powder, with all the board working, we can stand taller. We need to balance less than on we do when on firm snow where we're riding the edges.
In between turns, we have to change the edge. This is done by flattening the board from one edge and rolling it over to the new edge (with the front foot only, if you use both feet you'll catch the edge). As the board goes flat and your feet are flat to the ground, the most effective way to balance is to stand tall. Standing tall brings the skeletal frame back into alignment and brings your center of gravity over your feet. If you're not going to spend a lot of time on the flat board (as in quick, short turns when you go from edge to edge), you'll not always stand as tall as you might when rolling slowly from one edge to the other in large carved turns.
Effective balance comes from a relaxed upper body and soft joints. Sink and extend effectively to keep your center of gravity over your board.
How do stance and body position influence a snowboarder's center of gravity and technique?
I ride a very wide stance. After I have introduced the understanding of technique to my students, I find that they also feel the need to open their stances. A wide stance allows better flexion for balance. It also allows you to be more one-footed, allowing you to flex and edge the front and rear of the board independently. This lets you start and finish turns, and steer the board effectively.
I ride a slight negative angle in my rear foot as it allows me to apply pressure to the rear contact points of the toe and heel edge more effectively than a forward-facing rear foot. My front foot angle gives me my field of view: how much I can see by just turning my head and not rotating my body.
I ride a slight negative angle in my rear foot as it allows me to apply pressure to the rear contact points of the toe and heel edge more effectively than a forward-facing rear foot. My front foot angle gives me my field of view: how much I can see by just turning my head and not rotating my body. I need to be able to see enough but not so much that I rotate my upper body because that would disrupt my balance, my pressure, and board control. The further forward my front foot faces, the better view I'll get towards the fall line without creating unnecessary rotation. Too much angle, however, would reduce my ability to pressure toe-to-heel.
When I flex, my natural angle difference between my feet is about 30 degrees. With some negative angle in my rear foot, I am also limited in the angle of my front foot by the angle of my rear foot. In the end, as long as I keep 30 degrees between my feet (as this is how my body works), I can use what ever angles I like. I go for -9 +21, and it seems to work for me.