Video Editing Tips: Consider Slides, Pushes, and Splits in Premiere Pro
Growing tired of the same old default cross dissolve in Premiere Pro? Consider spicing up your splices with pushes, slides, and splits.
Cover Image and Footage via Shutterstock.
Good video editing requires a keen eye, a deft touch, and a deep understanding of what the scene needs to tell its story. It therefore stands to reason that good video editors would want a full array of tools at their disposal.
If you’ve been solely using and relying on default video transitions in Premiere Pro (which would be the classic but over-used cross dissolve), you’ve been cutting your craft short. Here are three transitions to consider using in your next Premiere Pro editing project: the slide, the push, and the split.
The Slide Transition
All three of these transitions are in the Premiere Pro “Effects” Panel (which defaults to the upper left corner of your screen in the latest CC edition). They are all under “Video Transitions” and the “Slides” folder.
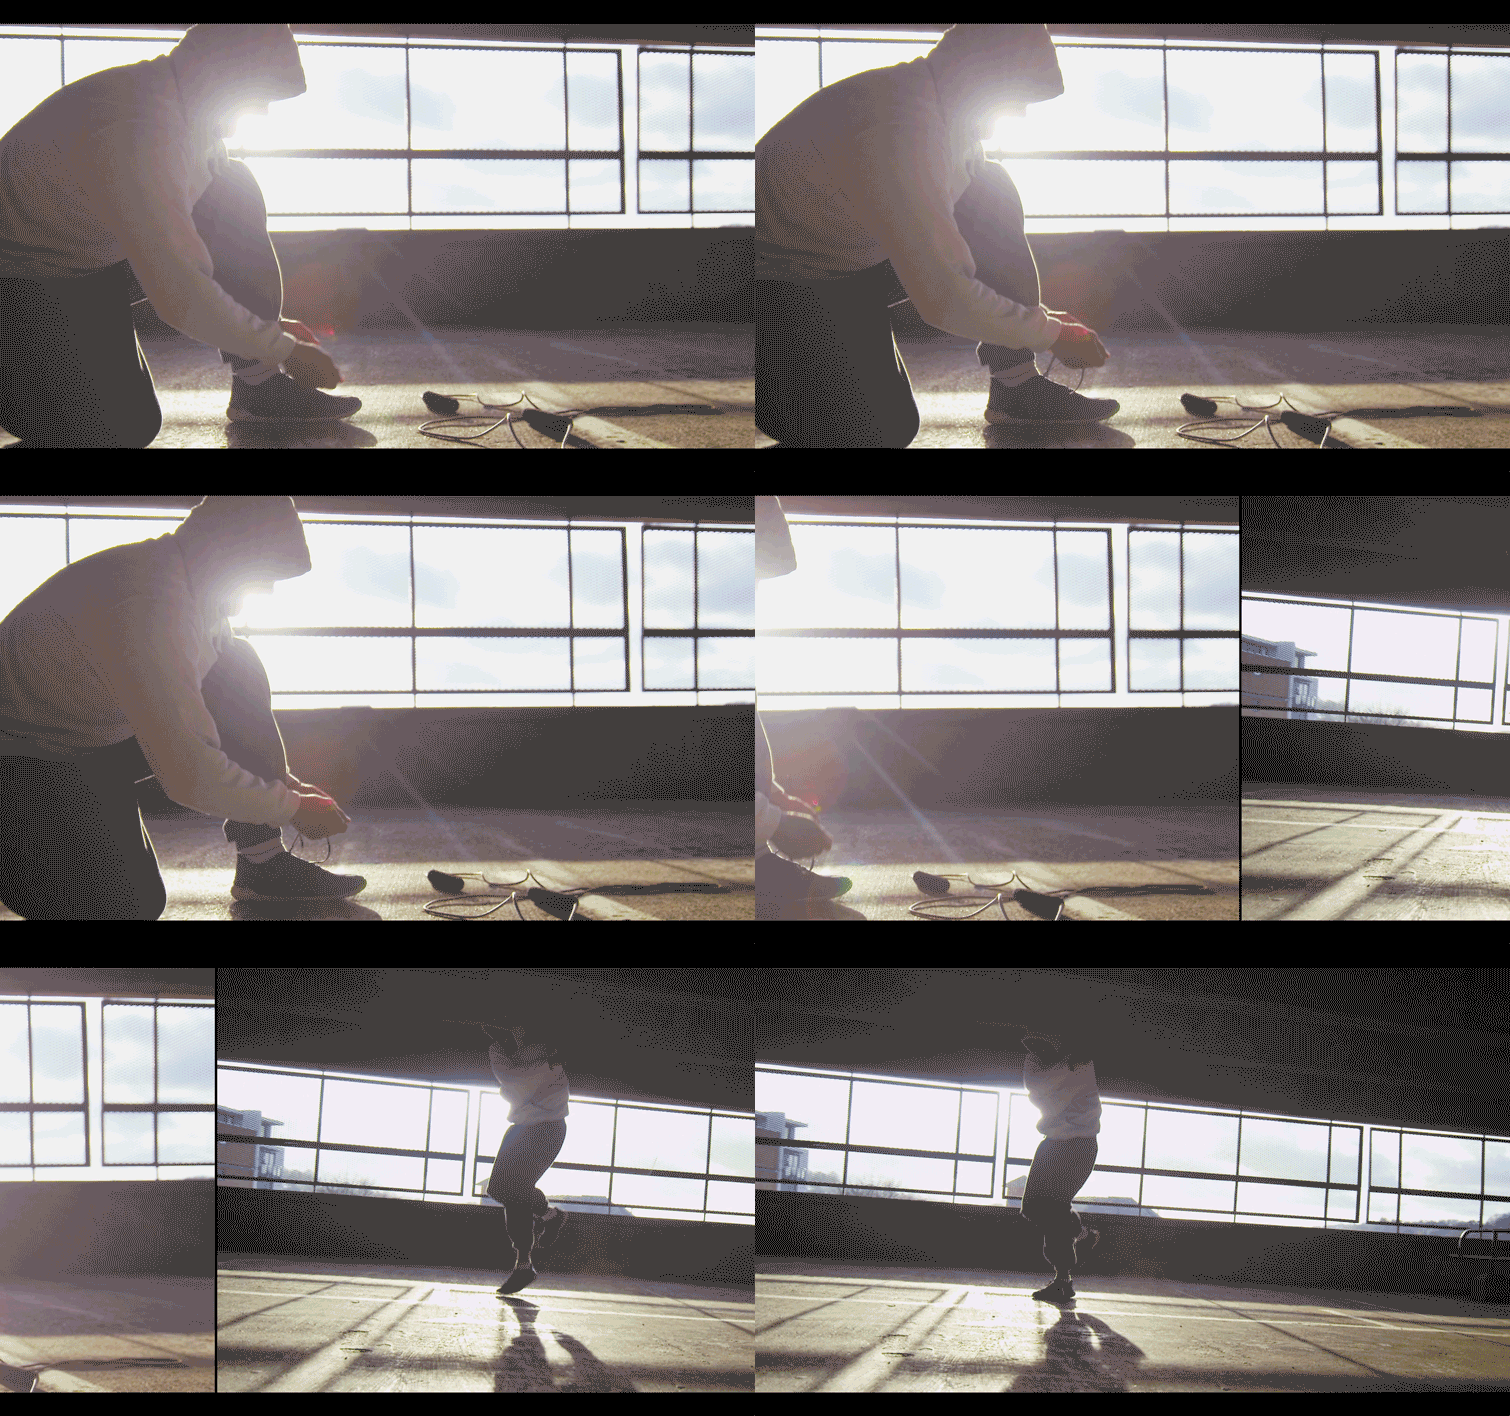
Like the folder’s name indicates, all three of these transitions are variants of an editing “slide,” but let’s start with the namesake. If you have two shots — the first being your “A Shot” and the 2nd being your “B Shot” — the transition simply “slides” the B shot across the A shot.
As you can see in the image above, once you’ve dropped your slide transition, you can change the alignment, the direction, the timing, and the borders. I’d recommend playing around with the borders and directions to get a feel for what you like.
The Push Transition
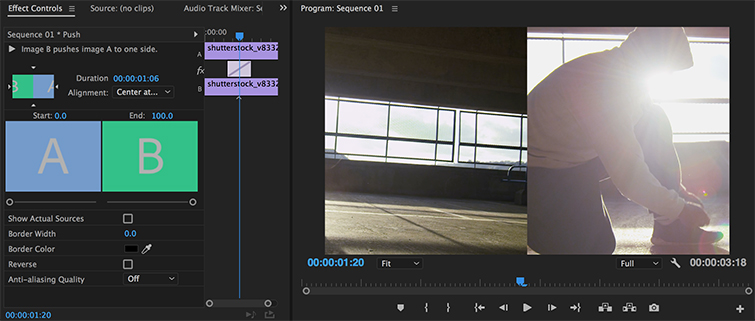
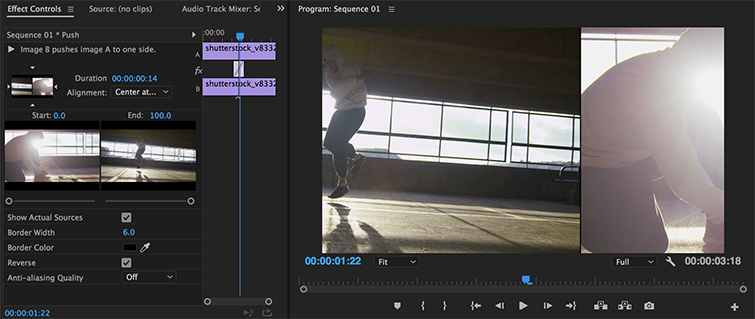
Similar to the slide transition, the push is, well, a little pushier. In this transition, the B shot literally “pushes” the A shot out. The result can be a little more jarring but also more playful — with the right juxtaposition.
The “Effect Control” options are pretty much the same as you saw with the slide. In the image above, you can see some of the effect modifications, including the border width and the shot reversal (to give it a more interesting look).
Pro-tip: Using the A and B previews, you can actually choose where you want each shot to begin, frame-by-frame, giving you pinpoint control of your transition.
The Split Transition
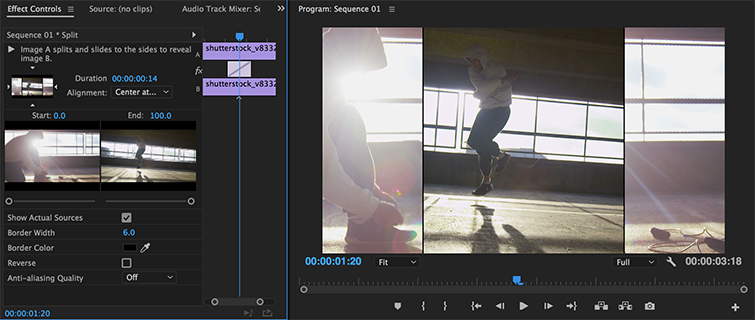
Perhaps my favorite of these three, the split (as opposed to the center split, which I will not recommend in this article) operates on the slide principle of overlaying your B shot on top of your A shot. However, unlike the slide, the split begins from the middle and moves evenly out in opposite directions. You can also reverse this transition so the B shot appears to close over the A shot.
The Effect Controls are the same as those you saw with the push. Personally, I try to use at least a six-point border width for these transitions as it gives the viewer a little more understanding of what they are seeing. Depending on your shot compositions, you can also use the split thematically to separate themes or create the feeling of either a reveal or closure.
Looking for info on other video editing transitions or additional tips and tricks? Check out these other articles and resources.
- Quickly Applying Default Transitions in Premiere Pro
- The Hidden Meaning Behind Popular Video Transitions
- 10 Free Packs: Over 125 Must-Have Assets for Video Editors
What are your go-to video editing transitions? Let us know in the comments.


