


. "Pin It")
Lately I've enjoyed bright colors, wall art, stencils and fabric. You can see where I'm going with this, and possibly how this wall art came about. In terms of stencils, I'm in love with Stencil 1. Everything just came together, and I like my wall art because I can use it for myself or give these as a gift. Or both. I have many friends that would love these stencils, I just need to customize it to their decor. You can make these too.
Gather These Supplies
Embroidery Hoops - I used one 12" and one 9"
Fabric pieces - I used two fat quarters that I've had; I bought them at JoAnns
Mod Podge Fabric
FolkArt Acrylic Paint - I used Vintage Orange and Aqua for the chair, Calypso Sky and Bright Baby Pink for the Deer
Flat paint brush
Stencil brush
Stencil tape or stencil adhesive
Stencil 1 stencils - Chair Mod Rocker and Antlered Deer, both 8.5" x 11"
 You'll need to wash and dry your fabric before Mod Podging it. Iron it and then place it on a non-stick surface (wax paper works great). Use your Fabric Mod Podge to prepare the fabric. Paint a medium layer over the fabric and allow it to dry.
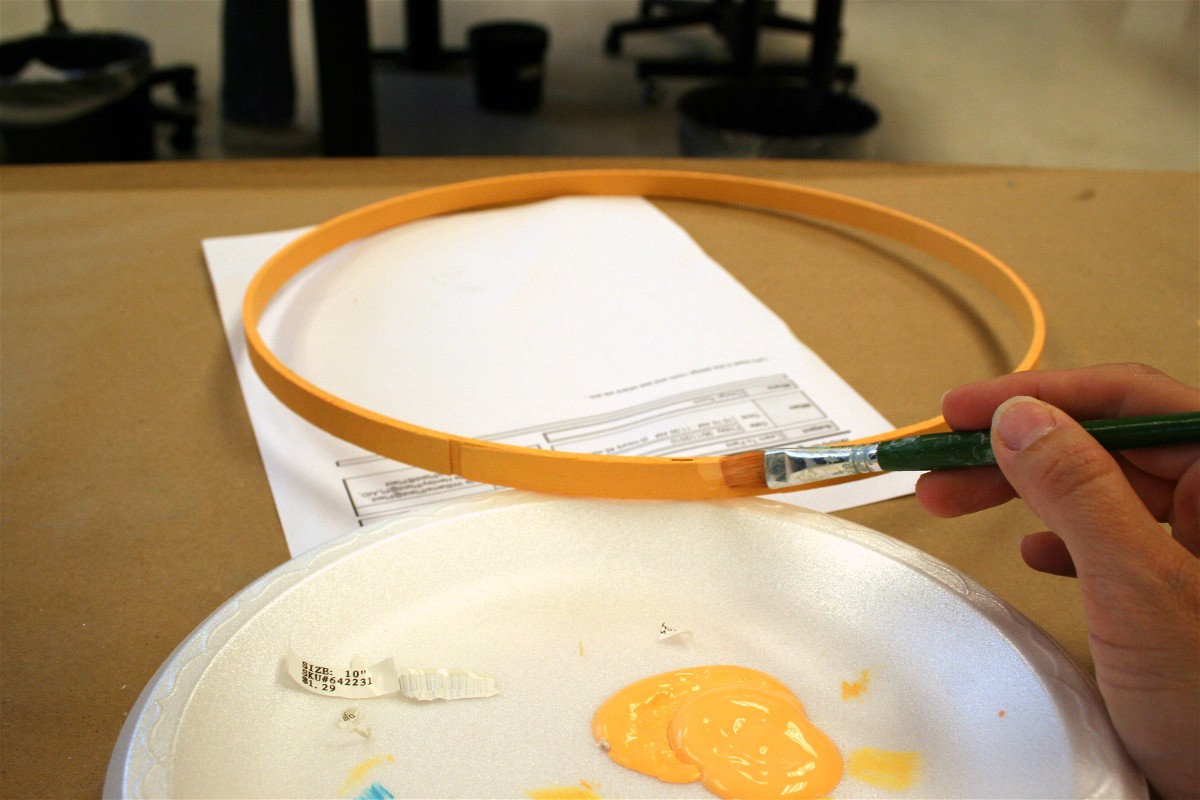 While your Mod Podged fabric is drying, paint your embroidery hoops with the paint color of your choice. I used my color wheel to put together my little color combo on this one. Cause I'm fancy like that. Allow the paint on your embroidery hoop to dry.
 Go back to your piece of fabric and tape down your stencil. I'm not quite sure why I did the "X's" - but you can't really question genius, can you? I'm completely kidding. I really wished after the fact that I would have used stencil adhesive. I had some runnage under the stencil that I had to wipe away. I can't believe I'm telling you that.
 Use the stencil brush and paint color of your choice to fill in the stencil. Remember not to get too much paint on your stencil brush. Stenciling is all about dry brushing and working slowly. Keep going until your entire stencil is covered. Once you are done painting, remove the stencil and allow the design to dry onto the fabric.
 When the painted is dry, assemble your wall art but putting the fabric between the two embroidery hoops and then screwing tightly. You can use some glue to hold it together. I didn't, but you can.
 The finishing touch is cutting away the excess fabric so that it doesn't hang out the back. Because that wouldn't be very cute. Your project is ready to hang on the wall!
Optional: coat the entire project with Mod Podge to glue the hoop in place and preserve your painted design. I will leave that up to you.

20 comments:
over the top cute!!! I love seeing the lovelies that you create!
smiles!
www.blackberryvine.blogspot.com
I L.O.V.E. this!!! Too Cute!
Nicole
OBVIOUSLY....fabric Mod Podge and I need to become aquainted. My matte Mod Podge is going to be super bugged. It's being replaced by glossy and fabric. Is glitter next?
am i the only person that thinks the mod rocker looks like a bird rocker? a bird with his tail cut off, but still, a bird rocker? no?
those are so cute! love the deer head!
I love this project!! Can't wit to try it out!!! And Ellie, I've got a silver and a gold shimmer Mod Podge that I love, you should try those out too!!
Thanks everyone! Randee, you are not the only one. I've heard that a few times. :D
I really really like these-great present potential. Oh and think of seasonal ones. Major winner.
Oh how pretty! Thanks for the fun idea, I'll be linking.
i love this technique! it's really rocking my world. so much fun to be had with good old modge podge.
I LOVE these. They are so pretty.
I would love for you to link these up to my Christmas in July linky party. I am hosting a month long homemade gift event and I think these would make GREAT gifts.
Hope to see you there.
Just Another Day in Paradise
These are the cutest!!
These are adorable. I especially love the chair stencil! Yay for modge podge!
They turned out great! Thanks for sharing @ Anything Related!
{Rebekah}
i always wonder what to do with my old hoops.... this is a beautiful option, isn't it?
i'm in the process of making something like this! just need to pick up some fabric. yours are so cute. love the stencils!!
*come take a looksy at my blog too if you'd like :)
Hi Amy, love these and thanks so much for sharing on Craft Schooling Sunday, great to see you again! xoxoxo Sara
I just purchased an armload of embroidery hoops from an estate sale, and this project idea is going to save them from mouldering away in my basement! Thanks Amy, you're the best!
Where do you find your stencils? I love the rocker!
so cute.. I love these. I have some crosstitch hoops Ive been wanting to do something with.. This might be the thing
Great art....Good color combination the blue and pink mixing of the colors are really beautiful....
Thanks for sharing with us......
Embroidery
Post a Comment
I can't respond to every comment, but I read them all. Thank you so much for reading - I really appreciate you!