
Do It Yourself: An Easy, Affordable & Super Stylish Upgrade for the $40 IKEA Nolmyra Chair
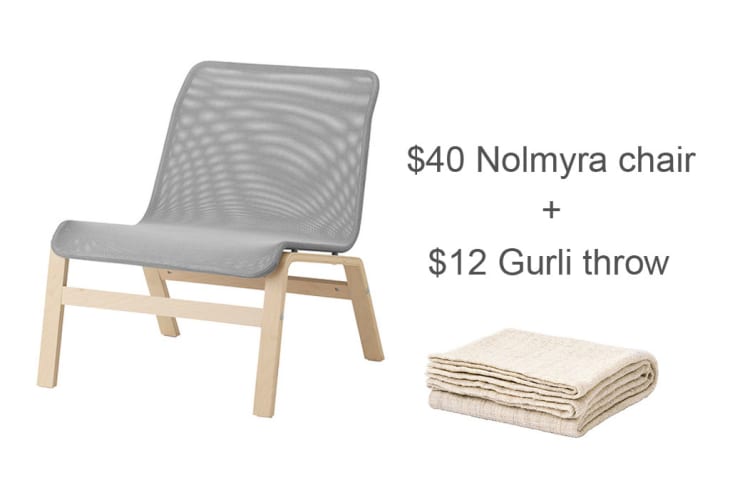
The Ikea Nolmyra has so much potential. Great lines, perfect scale, cool bent plywood legs. But with that stock gray mesh cover, it’s a like a sexy foot stuck in a dirty running shoe. You can easily upgrade it, though. Just toss a $12 Gurli throw into your Ikea cart, and we’ll show you how to give this cool little lounge chair a whole new look.
What You Need
Materials
Gurli throw (or 1.5 yards of 42″ wide fabric)
heavy duty thread
painters tape
gel stain (optional)
sand paper (optional)
Tools
needle and pins
sewing machine (optional)
Instructions
1. If you’d like to change the color of the wood legs, just give the surface a good scuff with some sandpaper and then apply a coat of your favorite color gel stain according to the manufacturer’s directions. I used 220 grit sandpaper and Minwax Gel Stain in hickory. If you like the classic Ikea pine color, then skip this step.
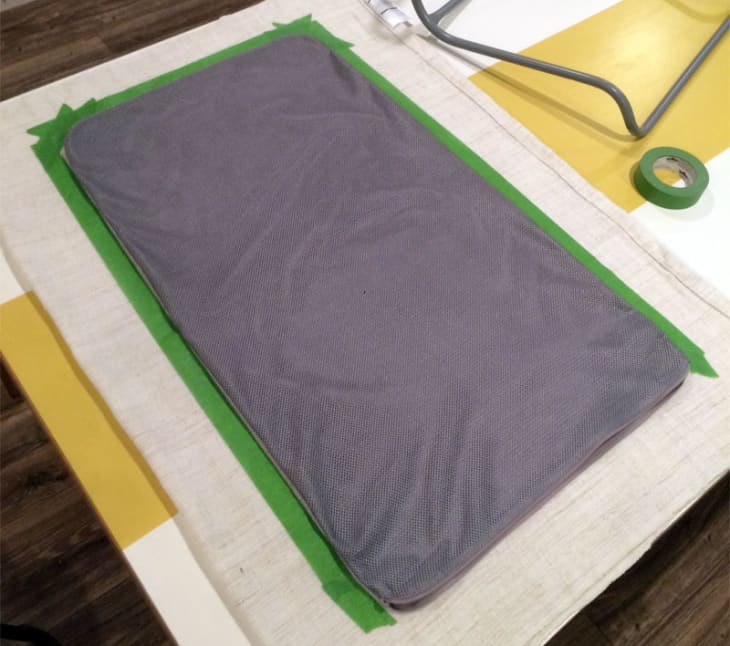
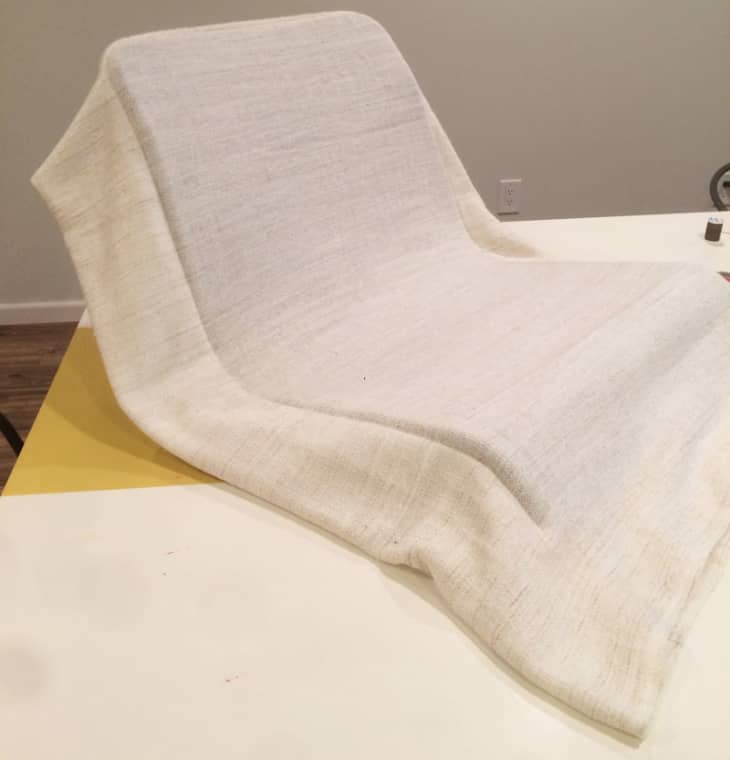
2. Unzip the gray cover and remove it from the metal chair frame. Fold the fabric in half and center the gray cover on top. Mark the edges of the cover with painters tape.
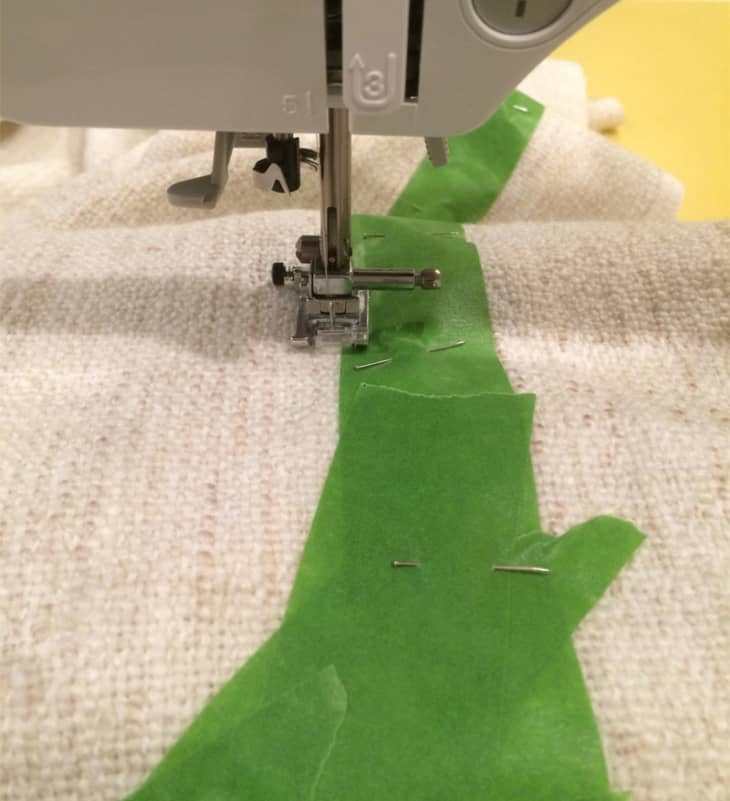
3. Remove the gray cover. Pin along the length of the painters tape. Stitch (machine or by hand) just along the inside edge of the painters tape. Do not stitch along the bottom edge! You need to leave it open so you can slide the fabric back onto the chair frame.
3. Put the gray cover back on the metal frame and zip it up. Slide the fabric over the gray cover.
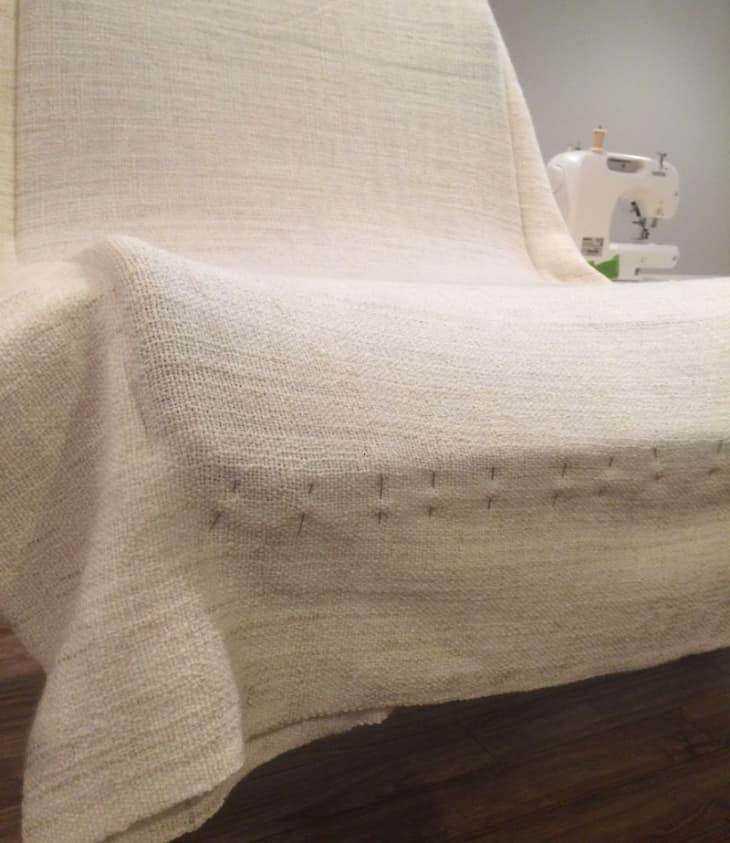
4. Pin the bottom edge of the fabric and hand stitch it closed.
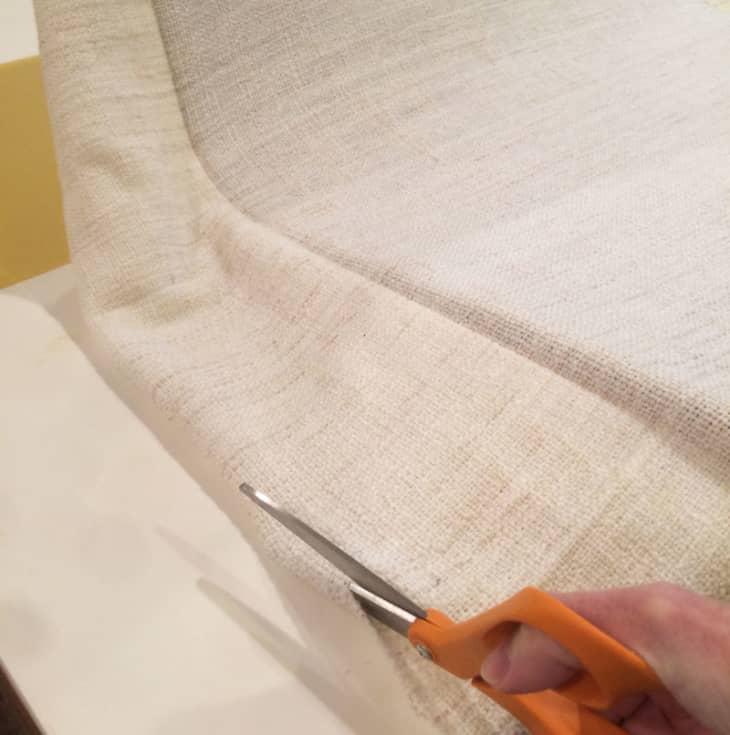
5. Cut the edge of the fabric all the way around the chair.
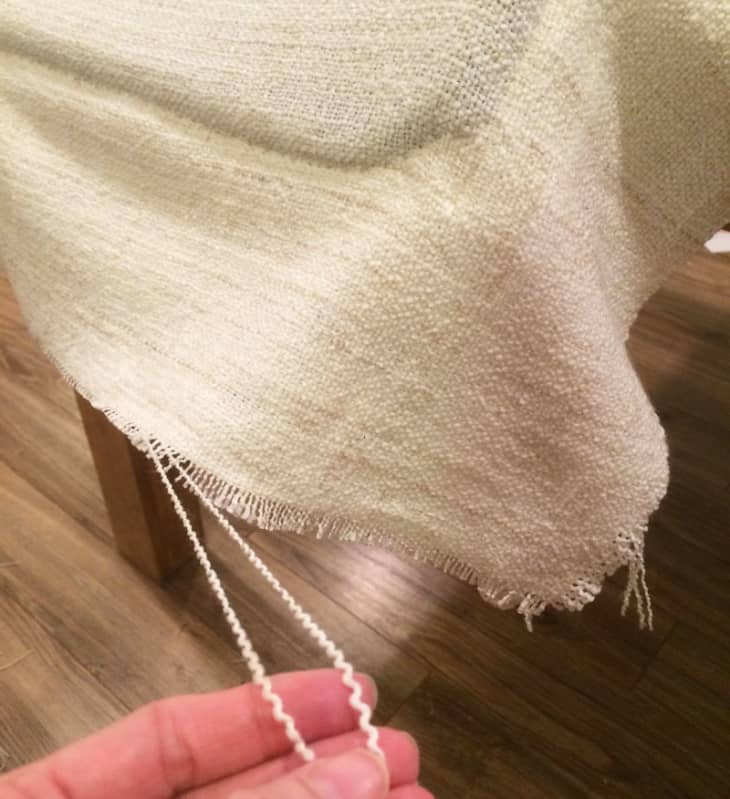
6. Unravel all the way up to the stitched seam. This part takes a while. Maybe watch tv or something while you unravel. Then trim the ends of the fringe so it’s all the same length.
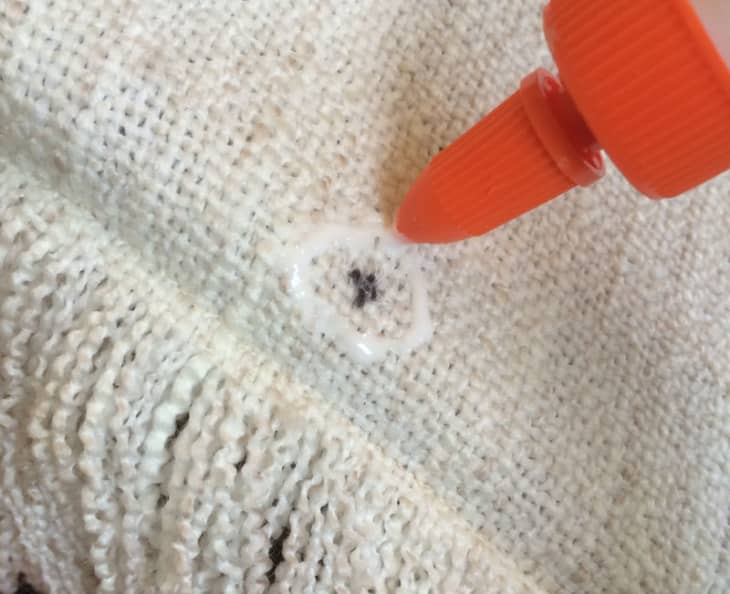
7. Run your finger along the bottom edge of the metal frame and feel for the 4 holes where the frame will be screwed onto the legs. Mark each hole location with a marker on the fabric. Draw a circle with glue around the hole. Then snip a hole in the fabric with scissors where you drew the mark. The glue will help keep the fabric from unraveling.
8. Screw the legs onto the frame according to the Ikea directions.
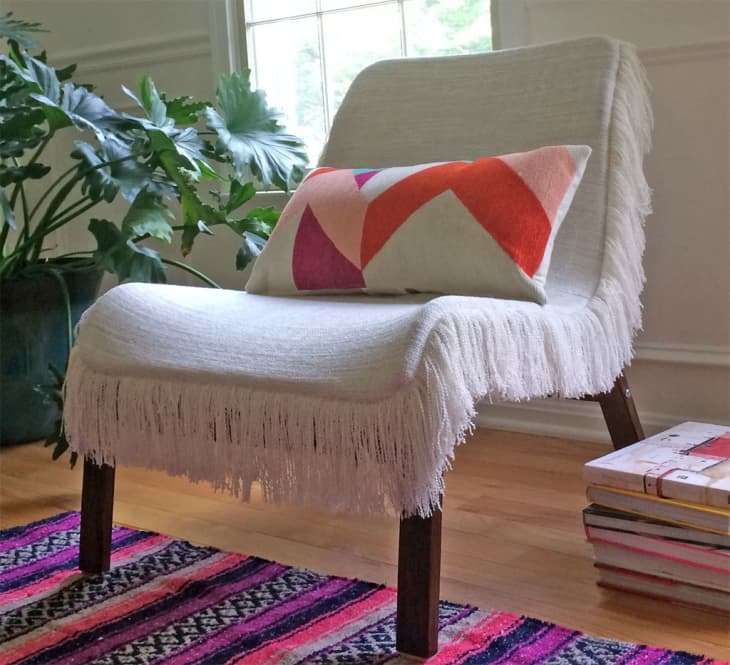
Your new chair is finished! Well done!
Have a really great DIY project or tutorial that you want to share with others? Let us know! We love checking out what you’re making these days, and learning from our readers. When you’re ready, click here to submit your project and photos.
Re-edited from a post originally published 6.14.16-NT