How to install and configure ModSecurity on cPanel/WHM!
Website security is very important matter to date, and ModSecurity is one of the best web application firewall out there helping many web masters around the world securing their web application. Already a lot of hosting companies and individual users are using cPanel/WHM to manage their web servers, in this article we will see how we can install and configure ModSecurity on cPanel/WHM. So lets get to it!
Step 1: Install and find ModSecurity Configuration files!
The latest cPanel/WHM software already comes with ModSecurity pre-installed, you can also configure it through WHM, but to have more control you need to know where the ModSecurity configuration files are located on the server. Configuration files are as follows:
- /etc/apache2/conf.d/modsec2.conf
- /etc/apache2/conf.d/modsec/modsec2.cpanel.conf
- /etc/apache2/conf.modules.d/800-mod_security2.conf – Just to load the ModSecurity module in apache.
These are most important files you should care about, all of them are managed by WHM it self, and if you make any changes inside these files manually they will be lost. So you have to make the change via GUI interface of WHM. But their is one file made available to us from WHM on which changes can be made, and it is located at :
- /etc/apache2/conf.d/modsec/modsec2.user.conf
This file can be manually edited by us and our changes will not be lost.
Step 2: Configure from WHM!
Even though ModSecurity is already installed with cPanel but you need to configure it before it can start working properly.
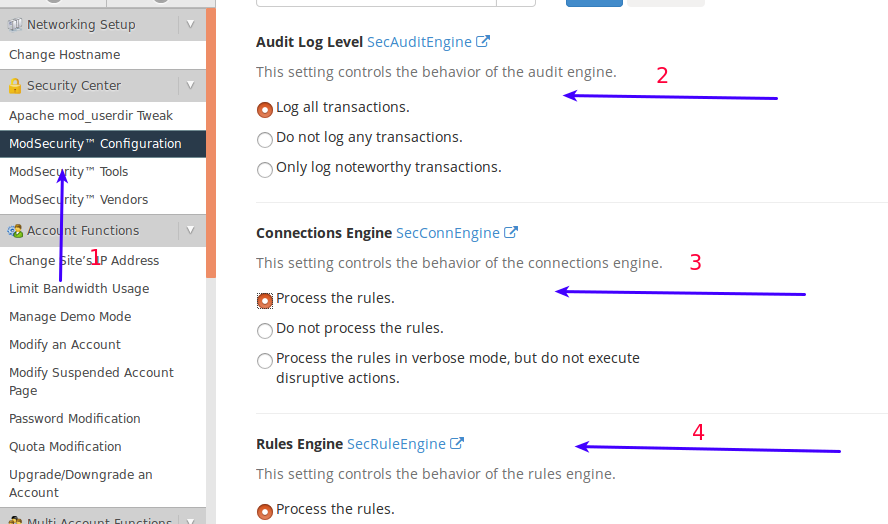
- Click ‘ModSecurity Configuration’ with in Security Center.
- Audit Log -> Log All Transactions.
- Connection Engine -> Process the rules.
- Rules Engine -> Process the rules
Make sure your settings looks like the settings in the image above, and click ‘Save’.
Step 3: Add your first Rule!
You are now ready to add your first rule and block the malicious traffic. 🙂

- Click ‘ModSecurity Tools’ under Security Center.
- Click the ‘Rules List’ on the right side of the window.
Your current window will now look like this:
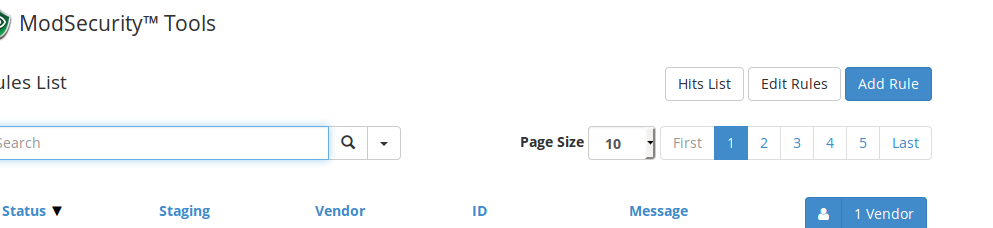
Click ‘Add Rule’ on the right side of the window. You will now be presented with this box:
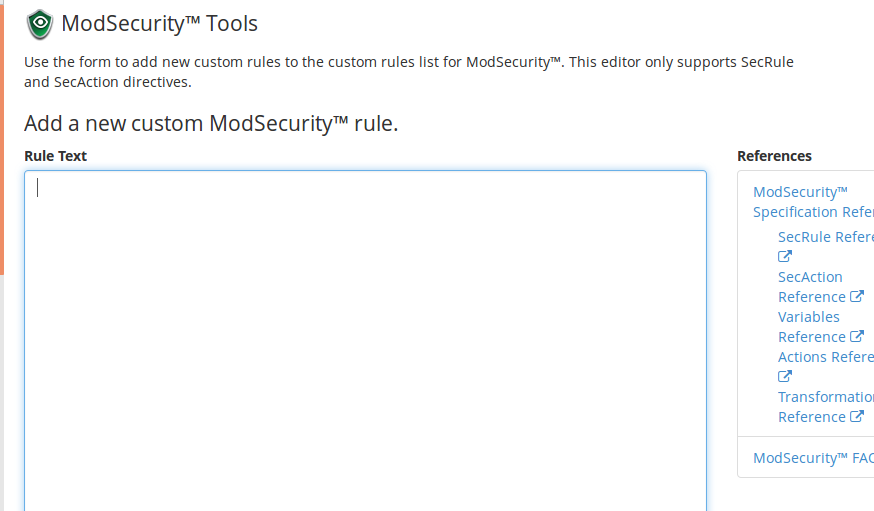
Paste the following text in the ‘Rule Text’ box:
SecRule
ARGS ABC “phase :2,id :’101021 ‘,log ,deny ,status :503 “
This rules simply says that if any of your arguments contains a string ‘ABC’ please block the web request and report to the logs that this request with rule id=’101021
Step 4: Test rule and view the logs
Now you need to make sure that the rule that you have just added is working properly, visit any site hosted on the server and add following at the end of the request
?test=ABC
Your complete URL might look like:
http://check.cyberpersons.com/?test=ABC
Upon visiting this url, you must have something like this displayed on your browser:
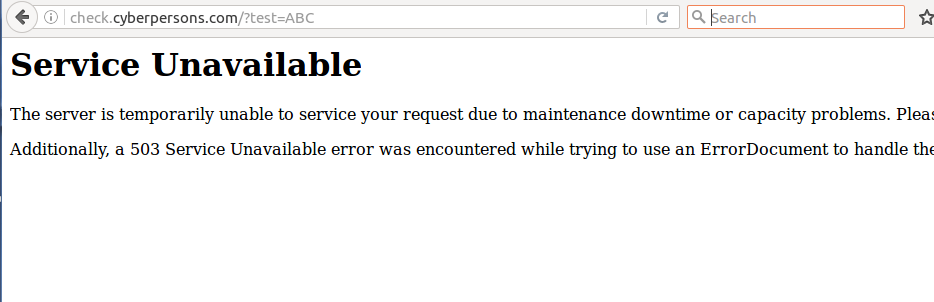
If you see this page, that means your ModSecurity rule is working correctly, you can than see all attacks towards your server as well.

As you can see in the image above that the attack we just simulated is logged inside WHM, just click ‘ModSecurity Tools’ under security center and you can see all the attack logs. You can see following details about the attack:
- URL For the web attack.
- How was this request handled.
- Which rule this attack matched against.
Step 5: Install Vendors!
Even though everything seems to be on track, but we don’t have any rules that can filter the large amount of malicious traffic. cPanel/WHM already have one vendor installed which you can enable.
Vendor provides you with standard set of rules that you can use without any technical knowledge, and it is very important that you should atleast use the cPanel/WHM provided vendor.
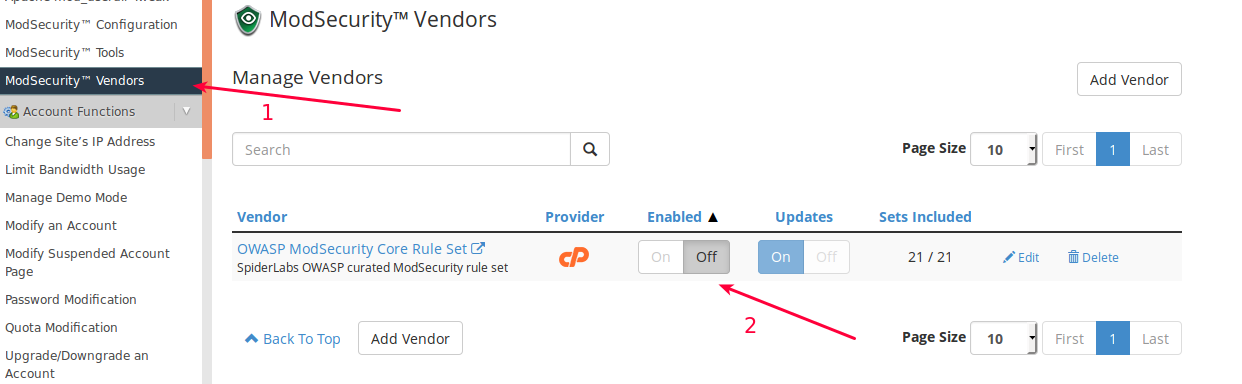
- Click ‘ModSecurity Vendors’.
- Just click ‘On’.
You successfully enabled OWASP ModSecurity Core rule set, this is rule set is free of use.
Step 6 (Optional): Add Rules Manually in Bulk!
If you have written couple hundred modsecurity rules manually and want to add them in your rule set you can do so. Just open the following file with choice of your file editor:
/etc/apache2/conf.d/modsec/modsec2.user.conf
Now paste all your rules and restart apache from WHM. Your new rules are now successfully activated and ready to go.