YouTube player

Internet radio is a great way to listen to stations from all around the world. But finding a way to casually listen to these stations at home isn’t convenient. Stand alone internet radios are costly, and hooking your computer directly up to your stereo isn’t ideal. Out of frustration, people will often listen to internet radio over the thin-sounding, awful speaker built into their phone or computer.

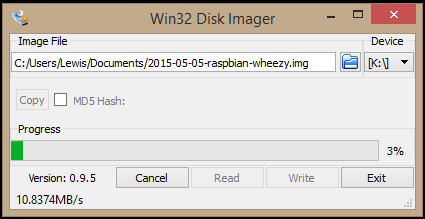
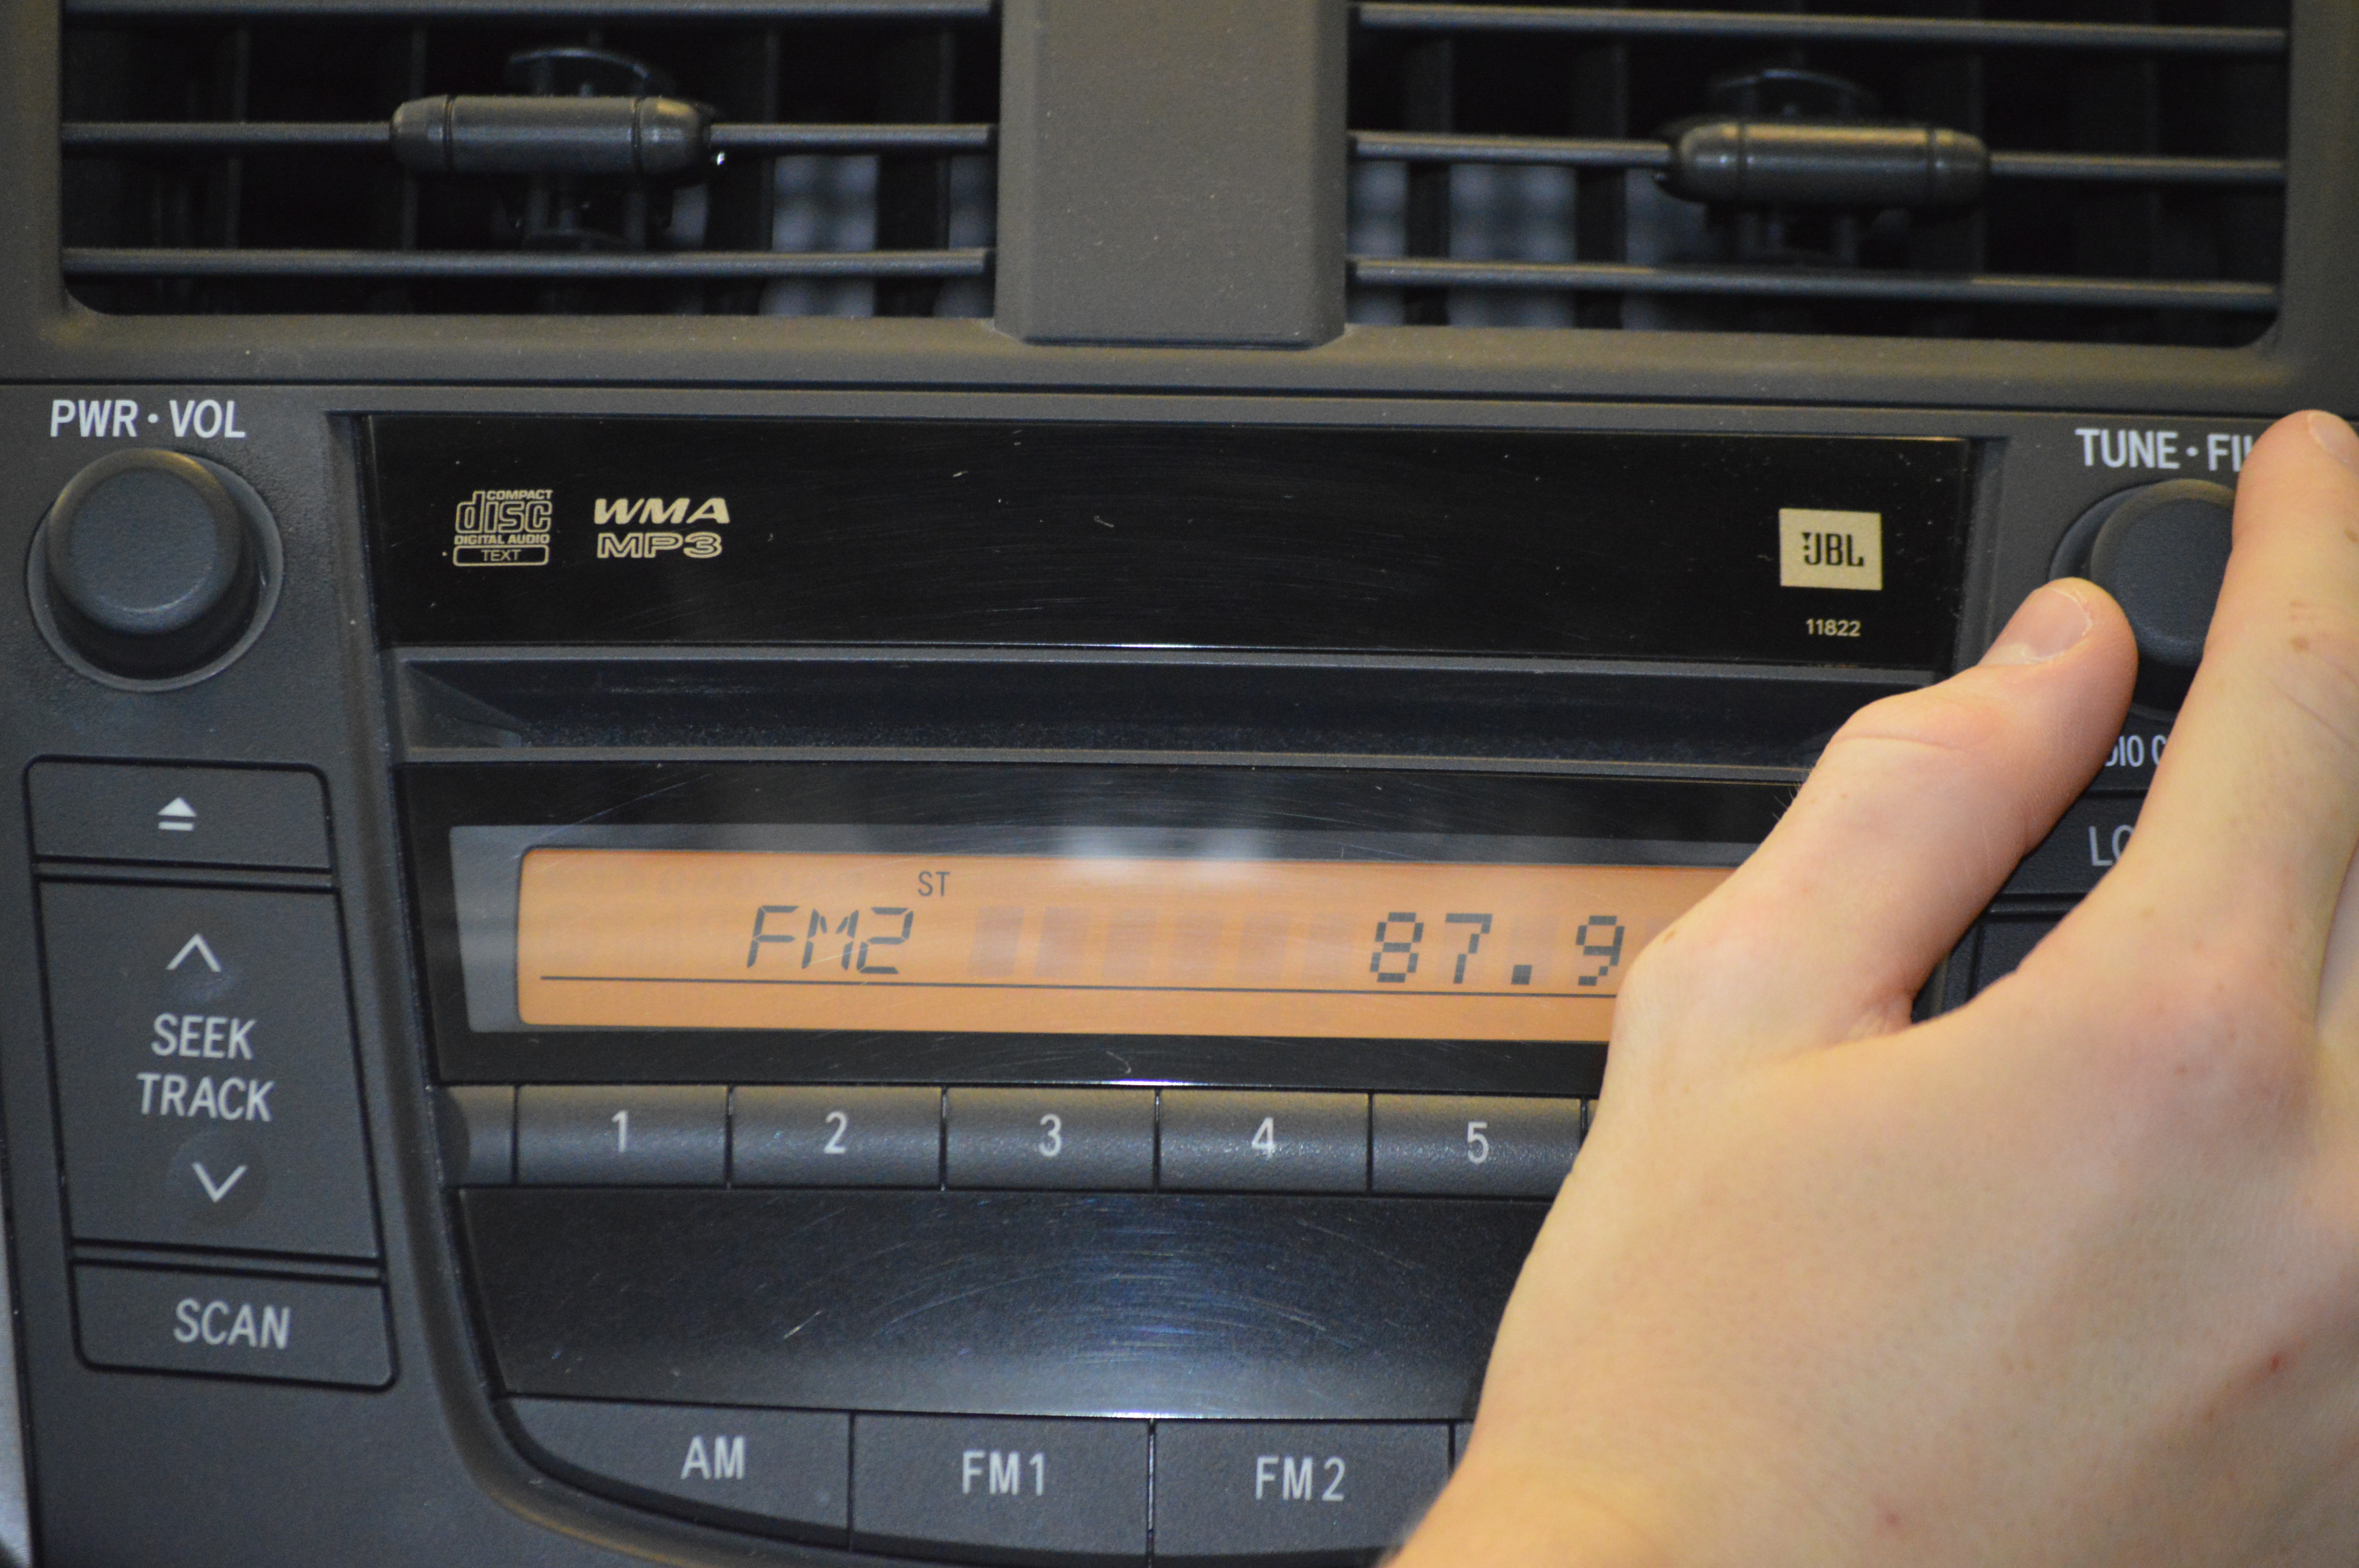
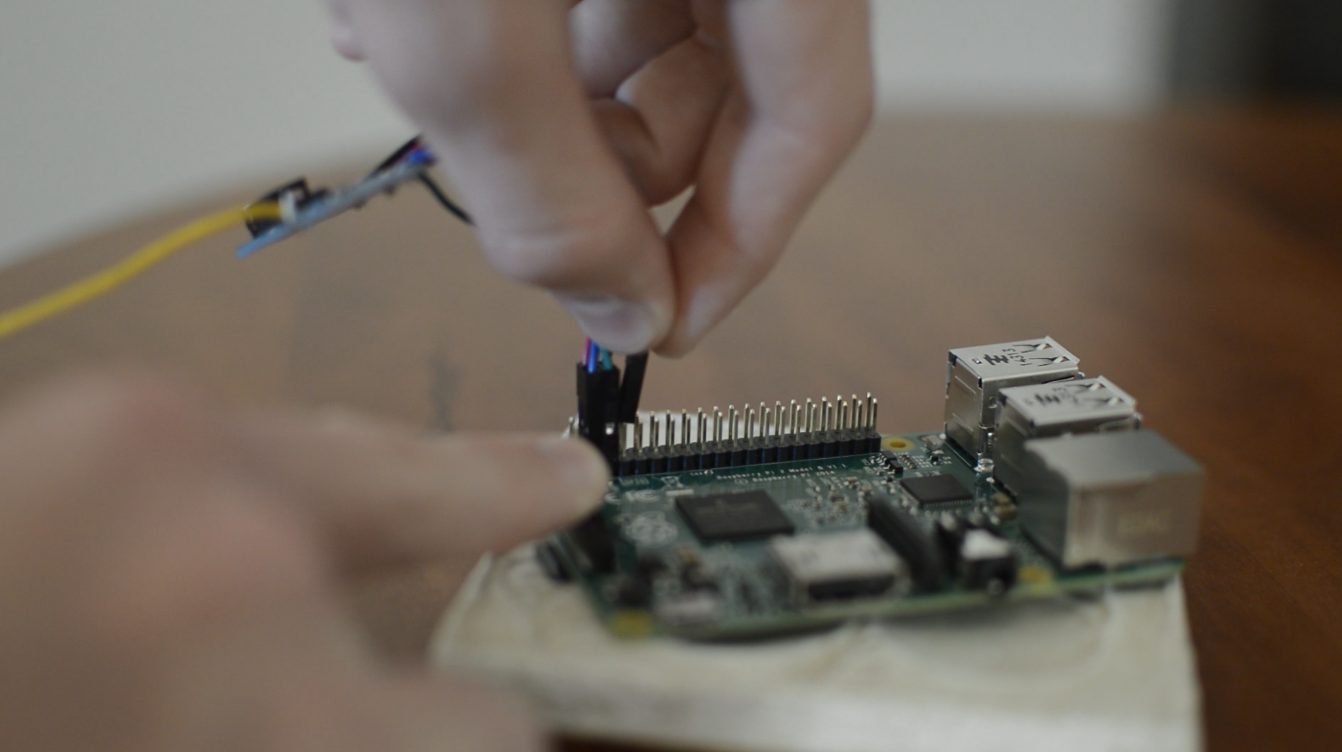
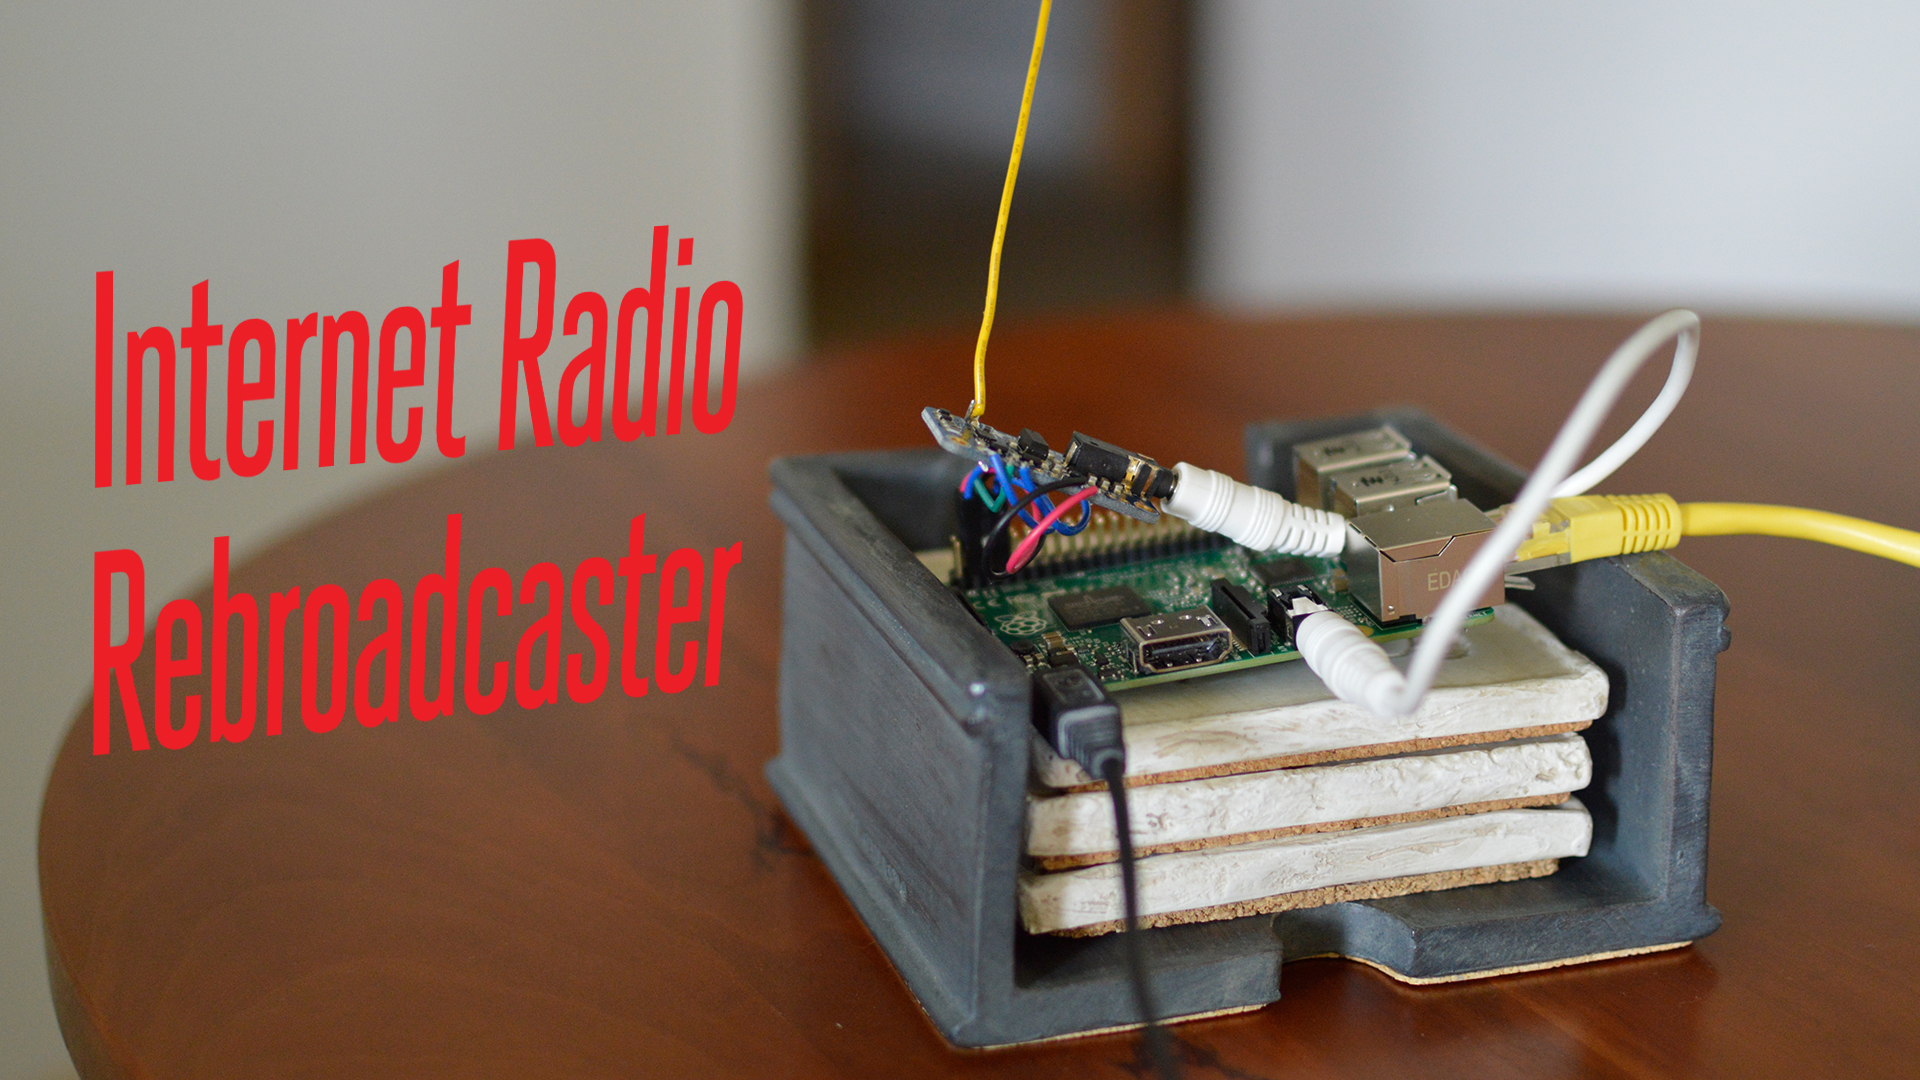
For a better solution, we are going to use a Raspberry Pi and Adafruit FM Transmitter to rebroadcast an internet radio station over the FM band, so it comes into your home stereo like a regular radio station. If done right, you’ll get both great audio quality and a wireless range of up to 30 feet.

_DSC0026

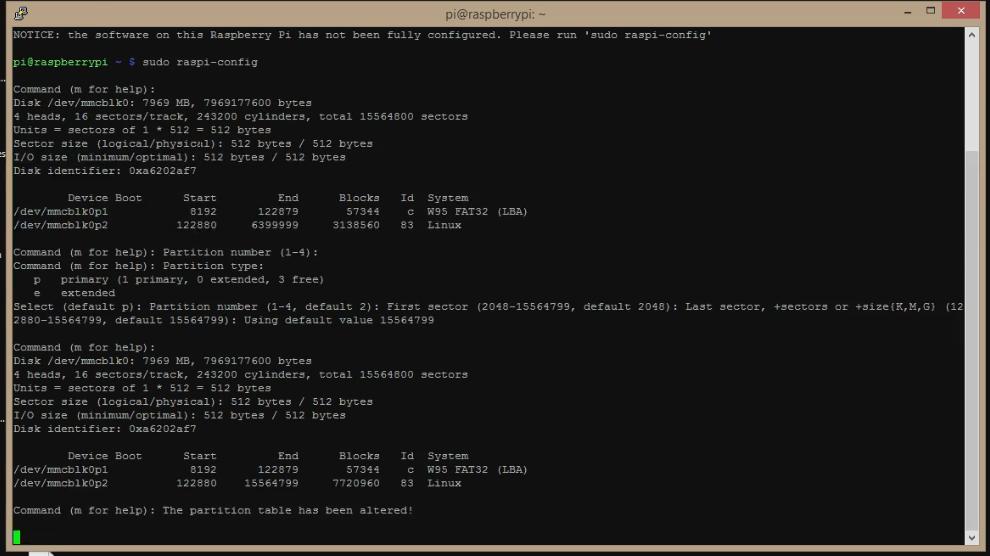
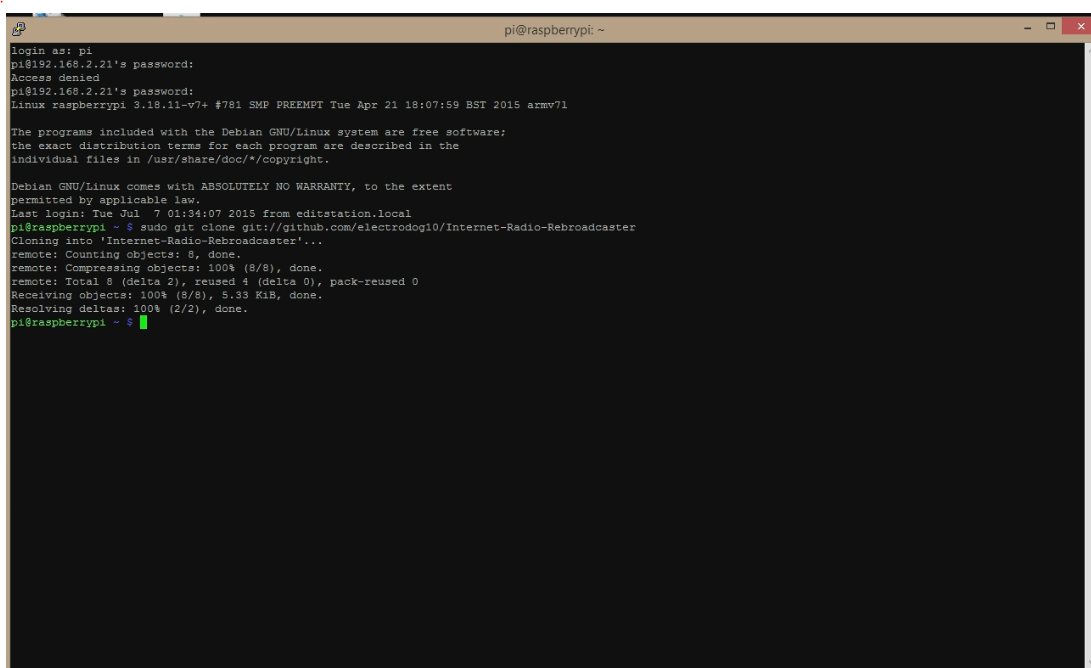
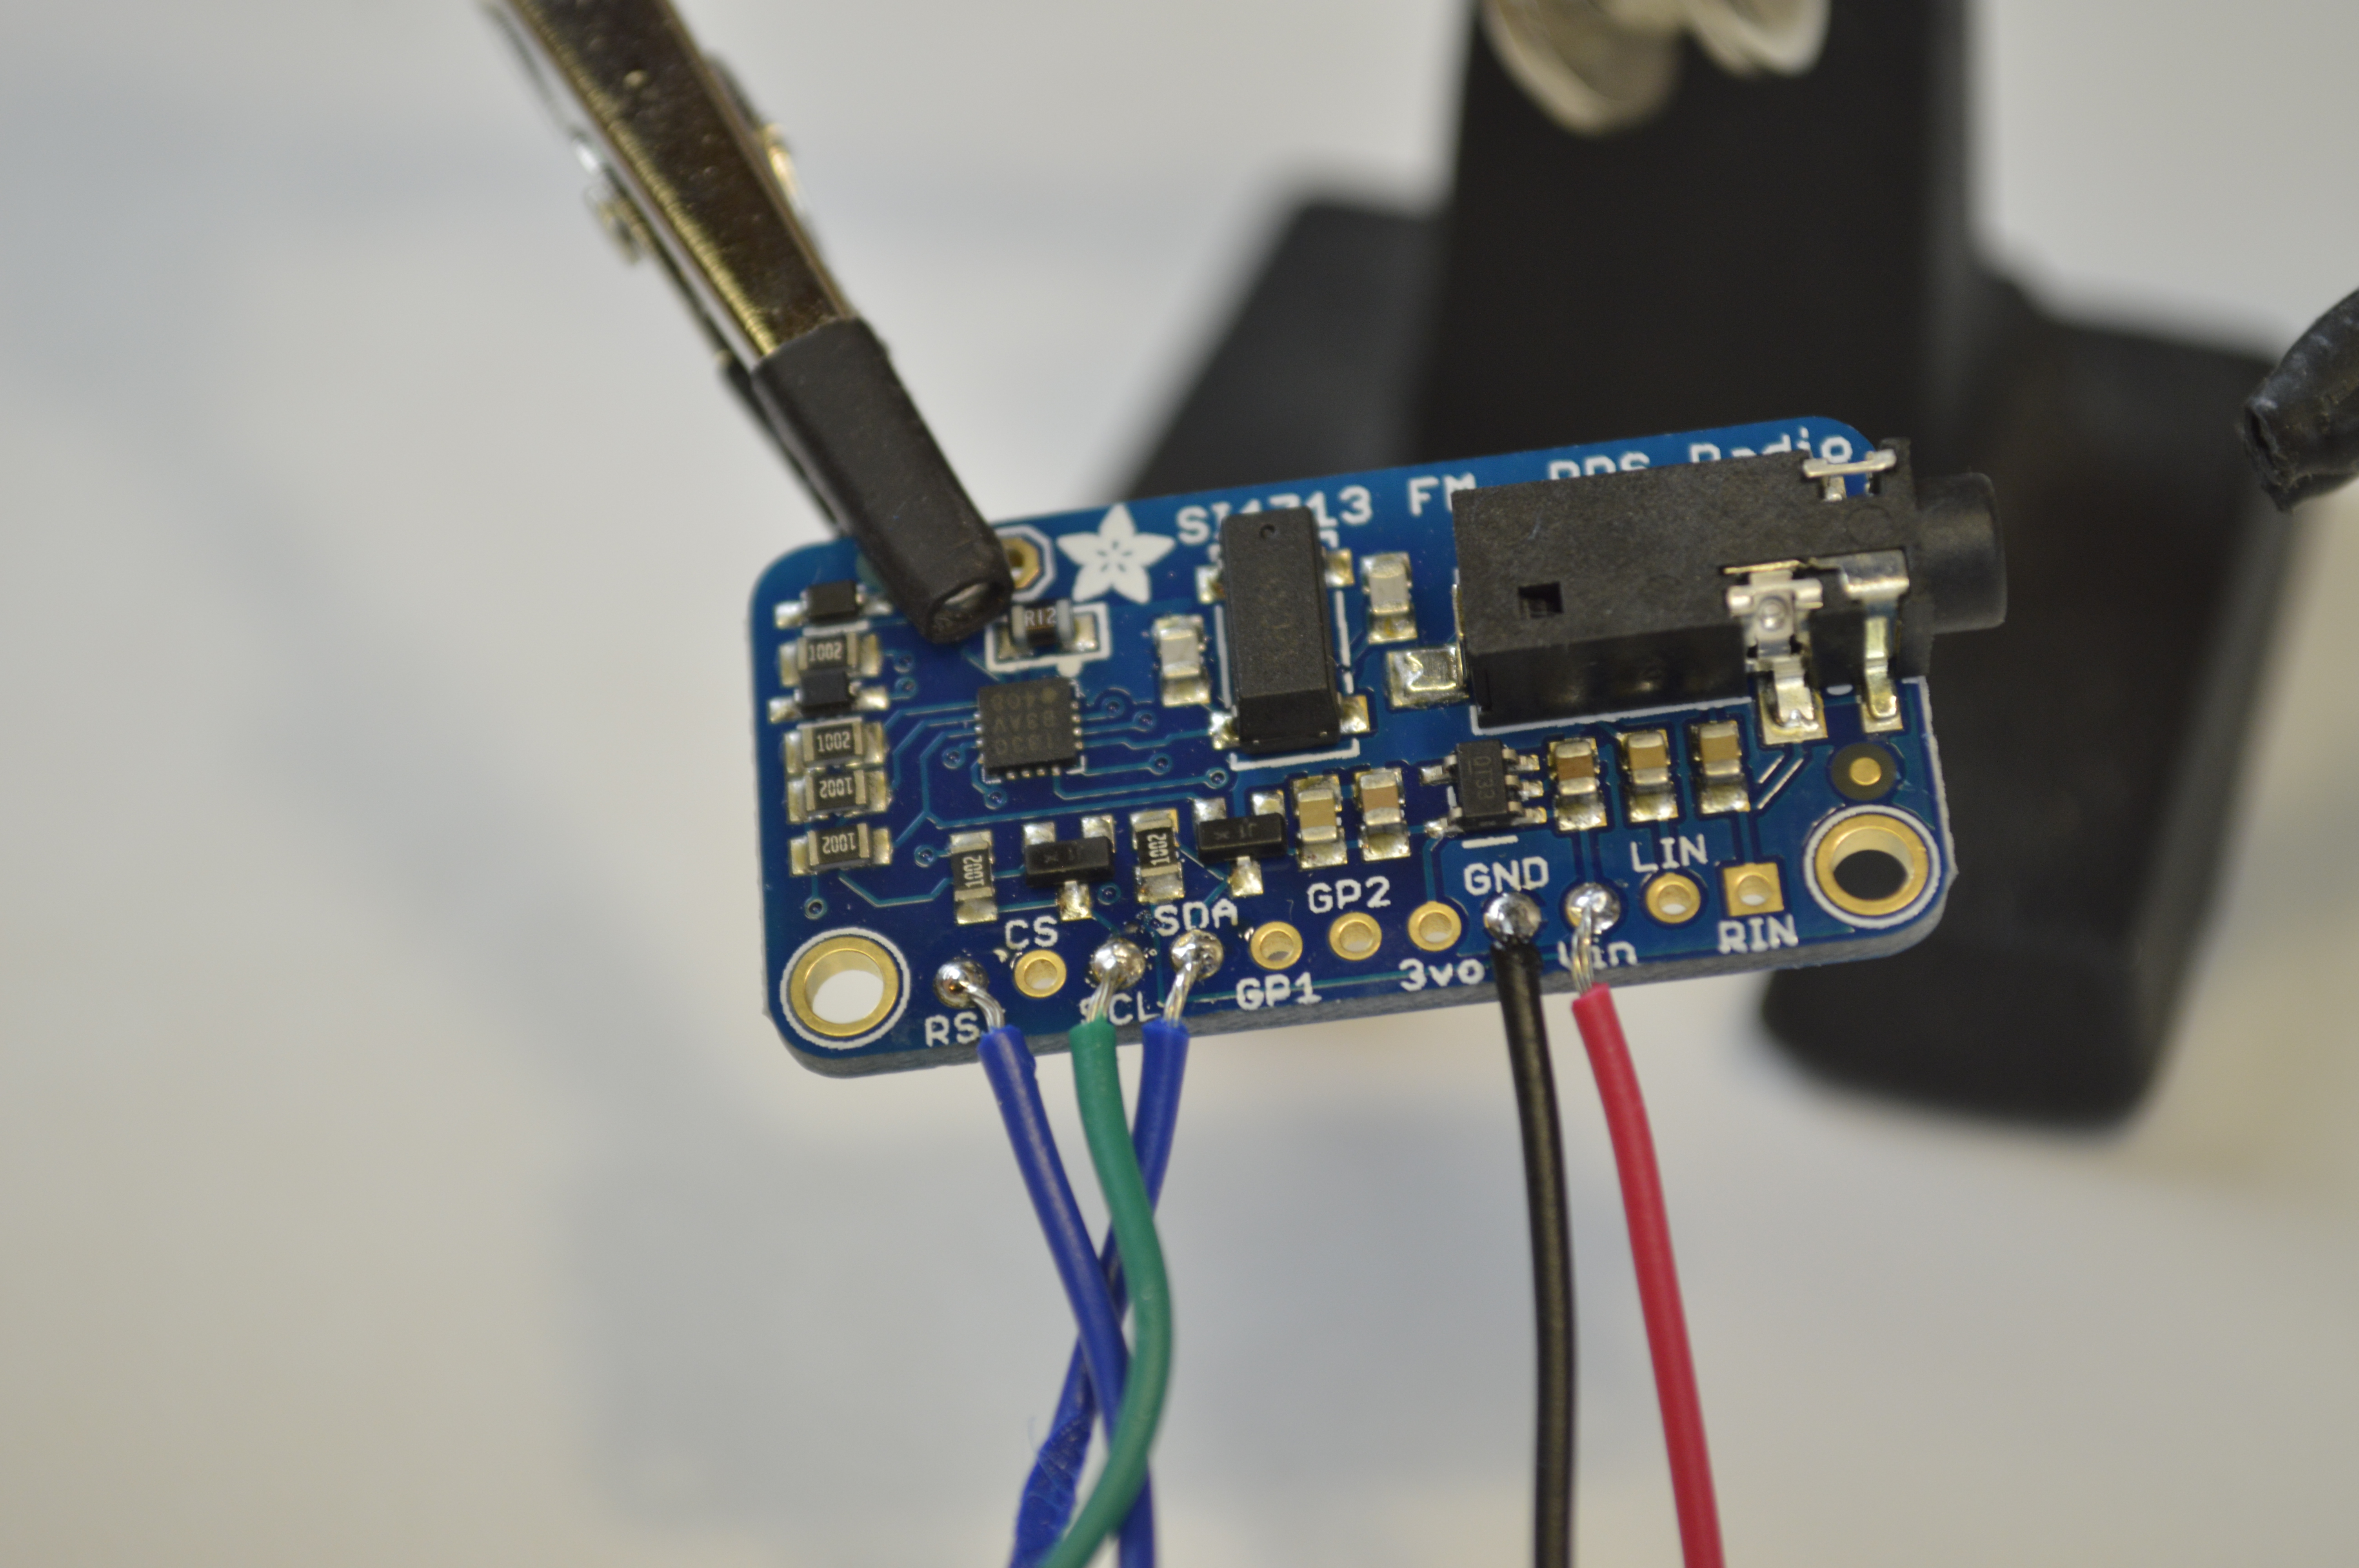
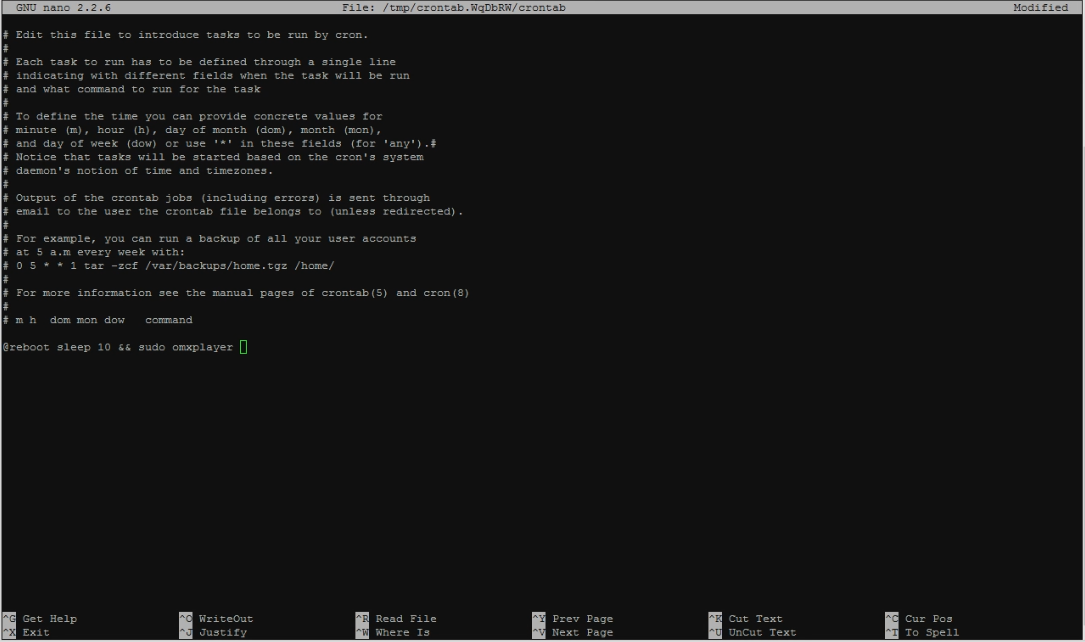
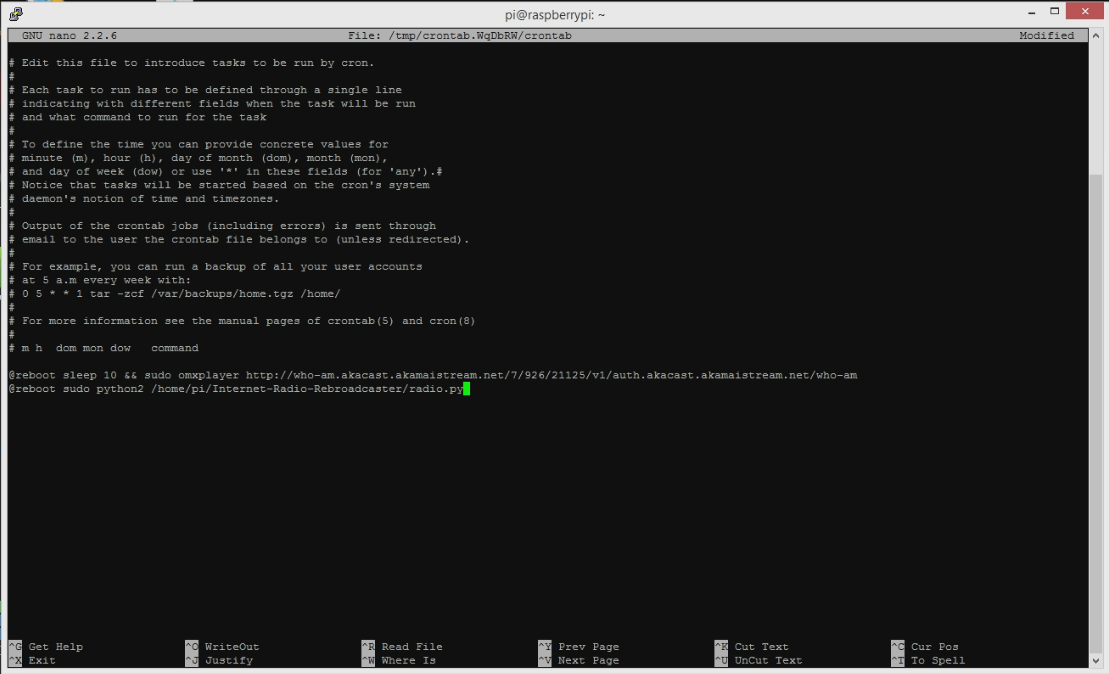
In the project below we will learn how to prepare the Raspberry Pi, download the files for the project, find an open frequency, and change the broadcasting frequency. We will also solder wires and connect an FM transmitter board. The final steps in the build consist of enabling I2C, finding an internet radio stream, and adding it.

This project should only take a weekend to build and about $75 in parts. Anyone with some soldering experience and some basic knowledge of the Raspberry Pi can build this project. If you’re new to Raspberry Pi, check out Make: magazine‘s tutorial on getting started with Raspberry Pi.

Just a quick note: In this project I set the Raspberry Pi up with an Ethernet cable plugged in. If you only have access to Wi-Fi, you can use a Wi-Fi adapter. You can follow these instructions to set it up. Keep in mind that Wi-Fi isn’t as reliable as Ethernet, so the stream may occasionally drop out.

Project Steps

Get started

Start off the project by downloading the latest image of Raspbian from the Raspberry Pi website.

Then write that image to an SD card using Win 32 Disk Imager (or Mac equivalent).

Now plug the Raspberry Pi into power and your network using an Ethernet cable and Micro USB Cable.

Now SSH into the Raspberry Pi and run the configuration tool by using the command:
sudo raspi-config
If you’re unfamiliar with SSH, the Raspberry Pi Foundation has great documentation for getting started (for both Mac and PC users).

Then choose the first option in the menu which expands the filesystem on the Pi.

Finally, select “Finish” on the main menu and choose to reboot the Pi.

Download the files for the project

Now SSH back into the Pi, and run:
sudo git clone git://github.com/electrodog10/Internet-Radio-Rebroadcaster

Now you have downloaded the required code for the project.

Change the broadcasting frequency

Now we need to find an open frequency for the project.

Use a high powered radio (a car radio works great) to scan up the FM band for an open frequency. Listen for a station that has absolutely no audio except static.

Also make sure that the station ends with an odd number, so it works with all types of stereos.

When you find an open frequency, write it down.

Now on the Raspberry Pi we need to edit the Radio python file so it will broadcast on our new frequency.

Type cd Internet-Radio-Rebroadcaster to open the directory for this project.

Now type sudo nano radio.py to edit the Python file.

In that file find the line that says FMSTATION = 10230

Change 10230 to the open frequency you wrote down earlier. Remember that 10230 is in 10KHz. For example, 101.1 MHz is written as 10110.

Now (cntrl) X and then type “Y” to save the document.

Connect the FM transmitter board

Cut at least three jumper wires in half (more if you color code your wires like me) and strip the end off of the wire end.

Solder a wire to the RST, SCL, SDA, GND, and Vin pins on the FM transmitter.

Solder a long piece of 18 gauge wire to the ANT pin on the transmitter. This wire will act as our antenna.

Now connect the RST pin on the FM transmitter board to Pin 7 (GPIO 4) on the Raspberry Pi.

Connect the SCL pin on the FM transmitter board to pin 5 (GPIO 3) on the Raspberry Pi.

Connect the SDA pin on the transmitter to pin 3 (GPIO 2) on the Raspberry Pi.

Connect the Vin pin on the transmitter to one of the 5V pins on the Raspberry Pi such as pin 2.

Connect the GND pin on the transmitter to one of the GND pins on the Raspberry Pi such as pin 6.

Finally connect a 3.5mm audio cable between the audio out jack on the Raspberry Pi and the audio in jack on the FM transmitter.

You can find a helpful pinout for the Raspberry Pi here.

Enable I2C on the Raspberry Pi

Now we need to enable I2C on the Raspberry Pi.

To start off, we need to install the required I2C libraries.
sudo apt-get install python-smbus
and when that is done installing
sudo apt-get install i2c-tools

Now type:sudo raspi-config
and select Advanced Options.

Then select I2C and answer “Yes” to all the questions.

Now select “Finish” on the bottom and answer “Yes” to the reboot question.

When the Pi reboots use nano to edit the following file: sudo nano /etc/modules

If the lines don’t already exist, add the following lines to the end of the code:
i2c-bcm2708
i2c-dev

Save that file with Control-X Y and then open sudo nano /etc/modprobe.d/raspi-blacklist.conf

If that file is blank, then do nothing with it. If it does, comment out (put a # in front of the line)
blacklist spi-bcm2708
blacklist i2c-bcm2708

Now edit boot configuration file:
sudo nano /boot/config.txt
and add the following lines:
dtparam=i2c1=on
dtparam=i2c_arm=on

Finally reboot the Pi with sudo reboot

Finding an internet radio stream

It’s easy to find an internet radio stream.

All you have to do is go to the website that contains the stream you want to listen to like this.

Now right click on the page and view the page source.

In the HTML code for the website, you should find the stream url. It should be in shoutcast format or .m3u8. The stream should be in this format hls_stream":"http://playlists.ihrhls.com/c1/925/playlist.m3u8"}

You can find out more about finding internet radio streams here.

To check and see if a radio station stream works, you can check it with VLC on your computer (or on the Raspberry Pi in desktop mode).

Add our internet radio stream

Now we need to edit the Crontab and make our project start at boot and add our internet radio stream.

First type sudo crontab -e

Then go to the bottom of the document and add the following line @reboot sleep 10 && sudo omxplayer STREAMURL

Replace STREAMURL with the stream URL of your internet radio station you want to rebroadcast. This is the line you need to change if you ever want to change the internet radio stream you are rebroadcasting. In my experience, I found that Shoutcast streams worked best.

Now add the following line after the line we just created:
@reboot sudo python2 /home/pi/Internet-Radio-Rebroadcaster/radio.py

Now Control-X to save and answer Y to save the document.

Use it!

Whenever you want to use the project, just plug the Raspberry Pi into power and internet, and tune your stereo to the open frequency you wrote down earlier.