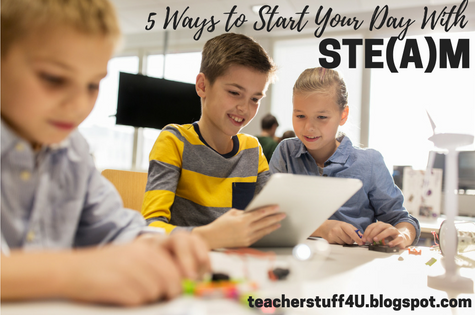
We've all seen the morning work or bell ringers that many teachers use to start the day. It usually consists of a packet of worksheets designed for independent practice. But independent practice doesn't have to mean more worksheets to print and more papers to grade. In fact, it can be more rigorous, engaging, authentic, and open-ended if you start your day with STEAM instead!
In her article STE(A)M for Young Learners, Dr. Rebecca Palacios says:
Here’s another way to think about STEAM:
- S(cience): A way of thinking
- T(echnology): A way of doing
- E(ngineering): A way of building
- A(rts): A way of creating
- M(athematics): A way of measuring
With this framework in mind, see how students respond when they get to start their day thinking, doing, building, creating, and measuring! This year, my school is beginning the day with a soft start. As students arrive at school (no more than 20 minutes before school starts), they can get breakfast and go straight to their classrooms. Whether you have students trickling in or you begin with the bell, starting with STEAM is a great way to get students excited about starting their school day! You can take attendance, lunch count, and turn in homework while students are engaged in authentic, open-ended, hands-on problem solving. Here are 5 ideas to get you started:
1. Science + Art: Let students record their observations of things found in nature.
Bring in bones, skulls, birds nests, snake skins, rocks, shells–whatever you can find. Challenge students to find things in nature too and bring it in to add to the science station. Let students touch it, study it, and observe it. Georgia O'Keefe was a famous artist who loved to draw things she found in nature like stones, flowers, and bones. Students can draw the items in the science station from different angles like Georgia O'Keefe or take pictures of the items and try to determine what they are and where they came from. Use a tool like SeeSaw that will allow students to take pictures, draw, and record their voice to explain what they see and design experiments to discover more about the items in the science station.
To keep it novel, you can have themes in your science center that align with different units you teach. For example, when you are studying animals, display the bones, shells, and bird nests in the science station. Have design questions for students to focus on, such as: How are structure and function related in living things? Why is it shaped that way? When you study rocks, sand, and silt, add a variety of rocks to your science station. Younger students can sort rocks by attributes, and older students can sort them by igneous, metamorphic, and sedimentary. They can even design experiments to determine what type of rock they have.
2. Technology + Math: Based on an idea from math guru Marilyn Burns in her book Math and Literature, students can calculate the number of feet that are in The Napping House.
After listening to the story The Napping House by Audrey Wood, pose this question to the students: How many feet are in the napping house? Students can create a math story problem to figure out how many feet they would find in the napping house using addition or multiplication to answer the question. Integrate technology by using a program such as Storyboard That, Paper 53, or Pic Collage to illustrate their thinking. Here is an example using Storyboard That:
You can continue the investigation by asking students to illustrate a math problem that shows how many feet are in THEIR house. For a more advanced option, you could have students create their own math riddles for their classmates to solve. For example, my riddle could be: There are 14 feet in my house. Who do you think lives in my house? The other students can illustrate the possibilities of who could live in my house based on the total number of feet. It could be a mom, a dad, a kid, and 2 dogs, or it could be a mom, a grandma, a kid, a baby, a bird, and a dog. What other possibilities are there?
You can also use the following books for more investigations that involve similar problem solving strategies when calculating how many animals are in the story:
3. Engineering + Coding: Don't Let the Pigeon Drive the Bus! Unless you give him driving lessons . . .
We all know that the Pigeon isn't supposed to drive the bus, but he really wants to! After reading the story Don't Let the Pigeon Drive the Bus by Mo Willams, propose this idea to the students: What if we give the Pigeon driving lessons so he can drive the bus? In this variation of the K'nex Chariot Challege activity from the Sphero EDU website, students will need to build a sturdy "bus" for the pigeon to drive that will be powered by a sphero. The bus can be made out of Kinex, similar to the chariot design challenge, or it can be made with paper tubes and popsicle sticks like The Flinstones activity found on the Sphero EDU website. Let the students be creative with the supplies you have on hand!
Once students have created a sphero-powered bus, they need to create a driver's ed course on which they will drive the bus. Make sure to include crosswalks and bus stops! Next, code the sphero to drive through your driver's ed course stopping at all the bus stops along way.
4. Engineering + Art: Let students make their own mech-animals that are both useful and beautiful.
Gather all the odds and ends you can find: screws, nuts, bolts, washers, wire, and pipe cleaners–whatever you can find–and let students sculpt their own Mech-animal masterpieces like in the story Mechanimals by Chris Tougas. For inspiration, check out this sculpture of a T-Rex made out of scrap metal by South Dakota Sculptor John Lopez:
In the book, each animal performed a special job to keep the farm running. Challenge students to design their Mech-animal to perform a useful job on the farm too.
For another variation on this project, students can use the iPad app Faces iMake to create their Mech-animal. Here is my example of the rooster clock whose job it is to wake you up in the morning:
Whichever version your students use to create their Mech-animal, they can use a program like Seesaw to take pictures and record their thinking and reasoning behind their design.
5. Science + Technology: Take students on a scavenger hunt as they do research to learn about animals of the rainforest.
The Great Kapok Tree by Lynne Cherry is an excellent introduction to animals of the rainforest. Send students on a research scavenger hunt to learn more about the animals that appear under the Great Kapok Tree with the app Goose Chase EDU. It is a fun and easy-to-use program that allows students to work cooperatively as they collect answers for a mission that you can create:
Goose Chase is easy to set up and organize, and it can be created for any subject. This could be a fun way to introduce a new unit, show students how to find facts, or teach students the importance of checking their facts. The sky is the limit!
Have fun starting your day with STEAM in the classroom!


No comments